Now that you’ve mastered the starter the big day is here. Don’t forget to feed your starter as described in the starter instructions in the lead up to bread making. The proportions mentioned below are for a yield of 2 loaves. Anymore and your mixer will probably not cope. If mixing by hand, as James will be, you’ll be kneading for hours! All of my sourdough recipes have been largely based on those in Bourke Street Bakery’s book.
My biggest tip is to read the recipe carefully a couple of days before you start. There are many steps and waiting periods. Given that I work full-time I can only make the bread on the weekend, starting the mixing & resting process on a Friday or Saturday night. The dough benefits from a rest in the fridge for about 8-12 hours. Over this time the complexity of the flavour develops. After the rest it needs to sit out of the fridge from 1-4 hours while it rises. I can’t get out of bed that early on a work day! So I have a routine of starting the mix when I get home from work on Friday and bake on a Saturday morning. It might seem tedious but once you get in the swing of it, it’s really not that onerous.
A note on flour. What I’ve seen recommended for sourdough is stone-ground flour. This is the traditional way flour was once milled. These days high-speed steel rollers are used which heat the wheat as it is milled, thus destroying much of its nutrient content. The stone-ground flour is naturally strong, which is recommended for bread. Organic or biodynamic flours are most likely to be stone-ground. I started making my sourdough with a supermarket brand organic white flour and have recently switched to a biodynamic stone-ground white flour. There has been a definite improvement in taste & texture since. By using this flour in the starter I have seen improvements there too. If high-grade ingredients are used it will be reflected in the results.
Ingredients
310g sourdough starter
510g stone-ground organic flour
265ml filtered water
14g sea salt
Method
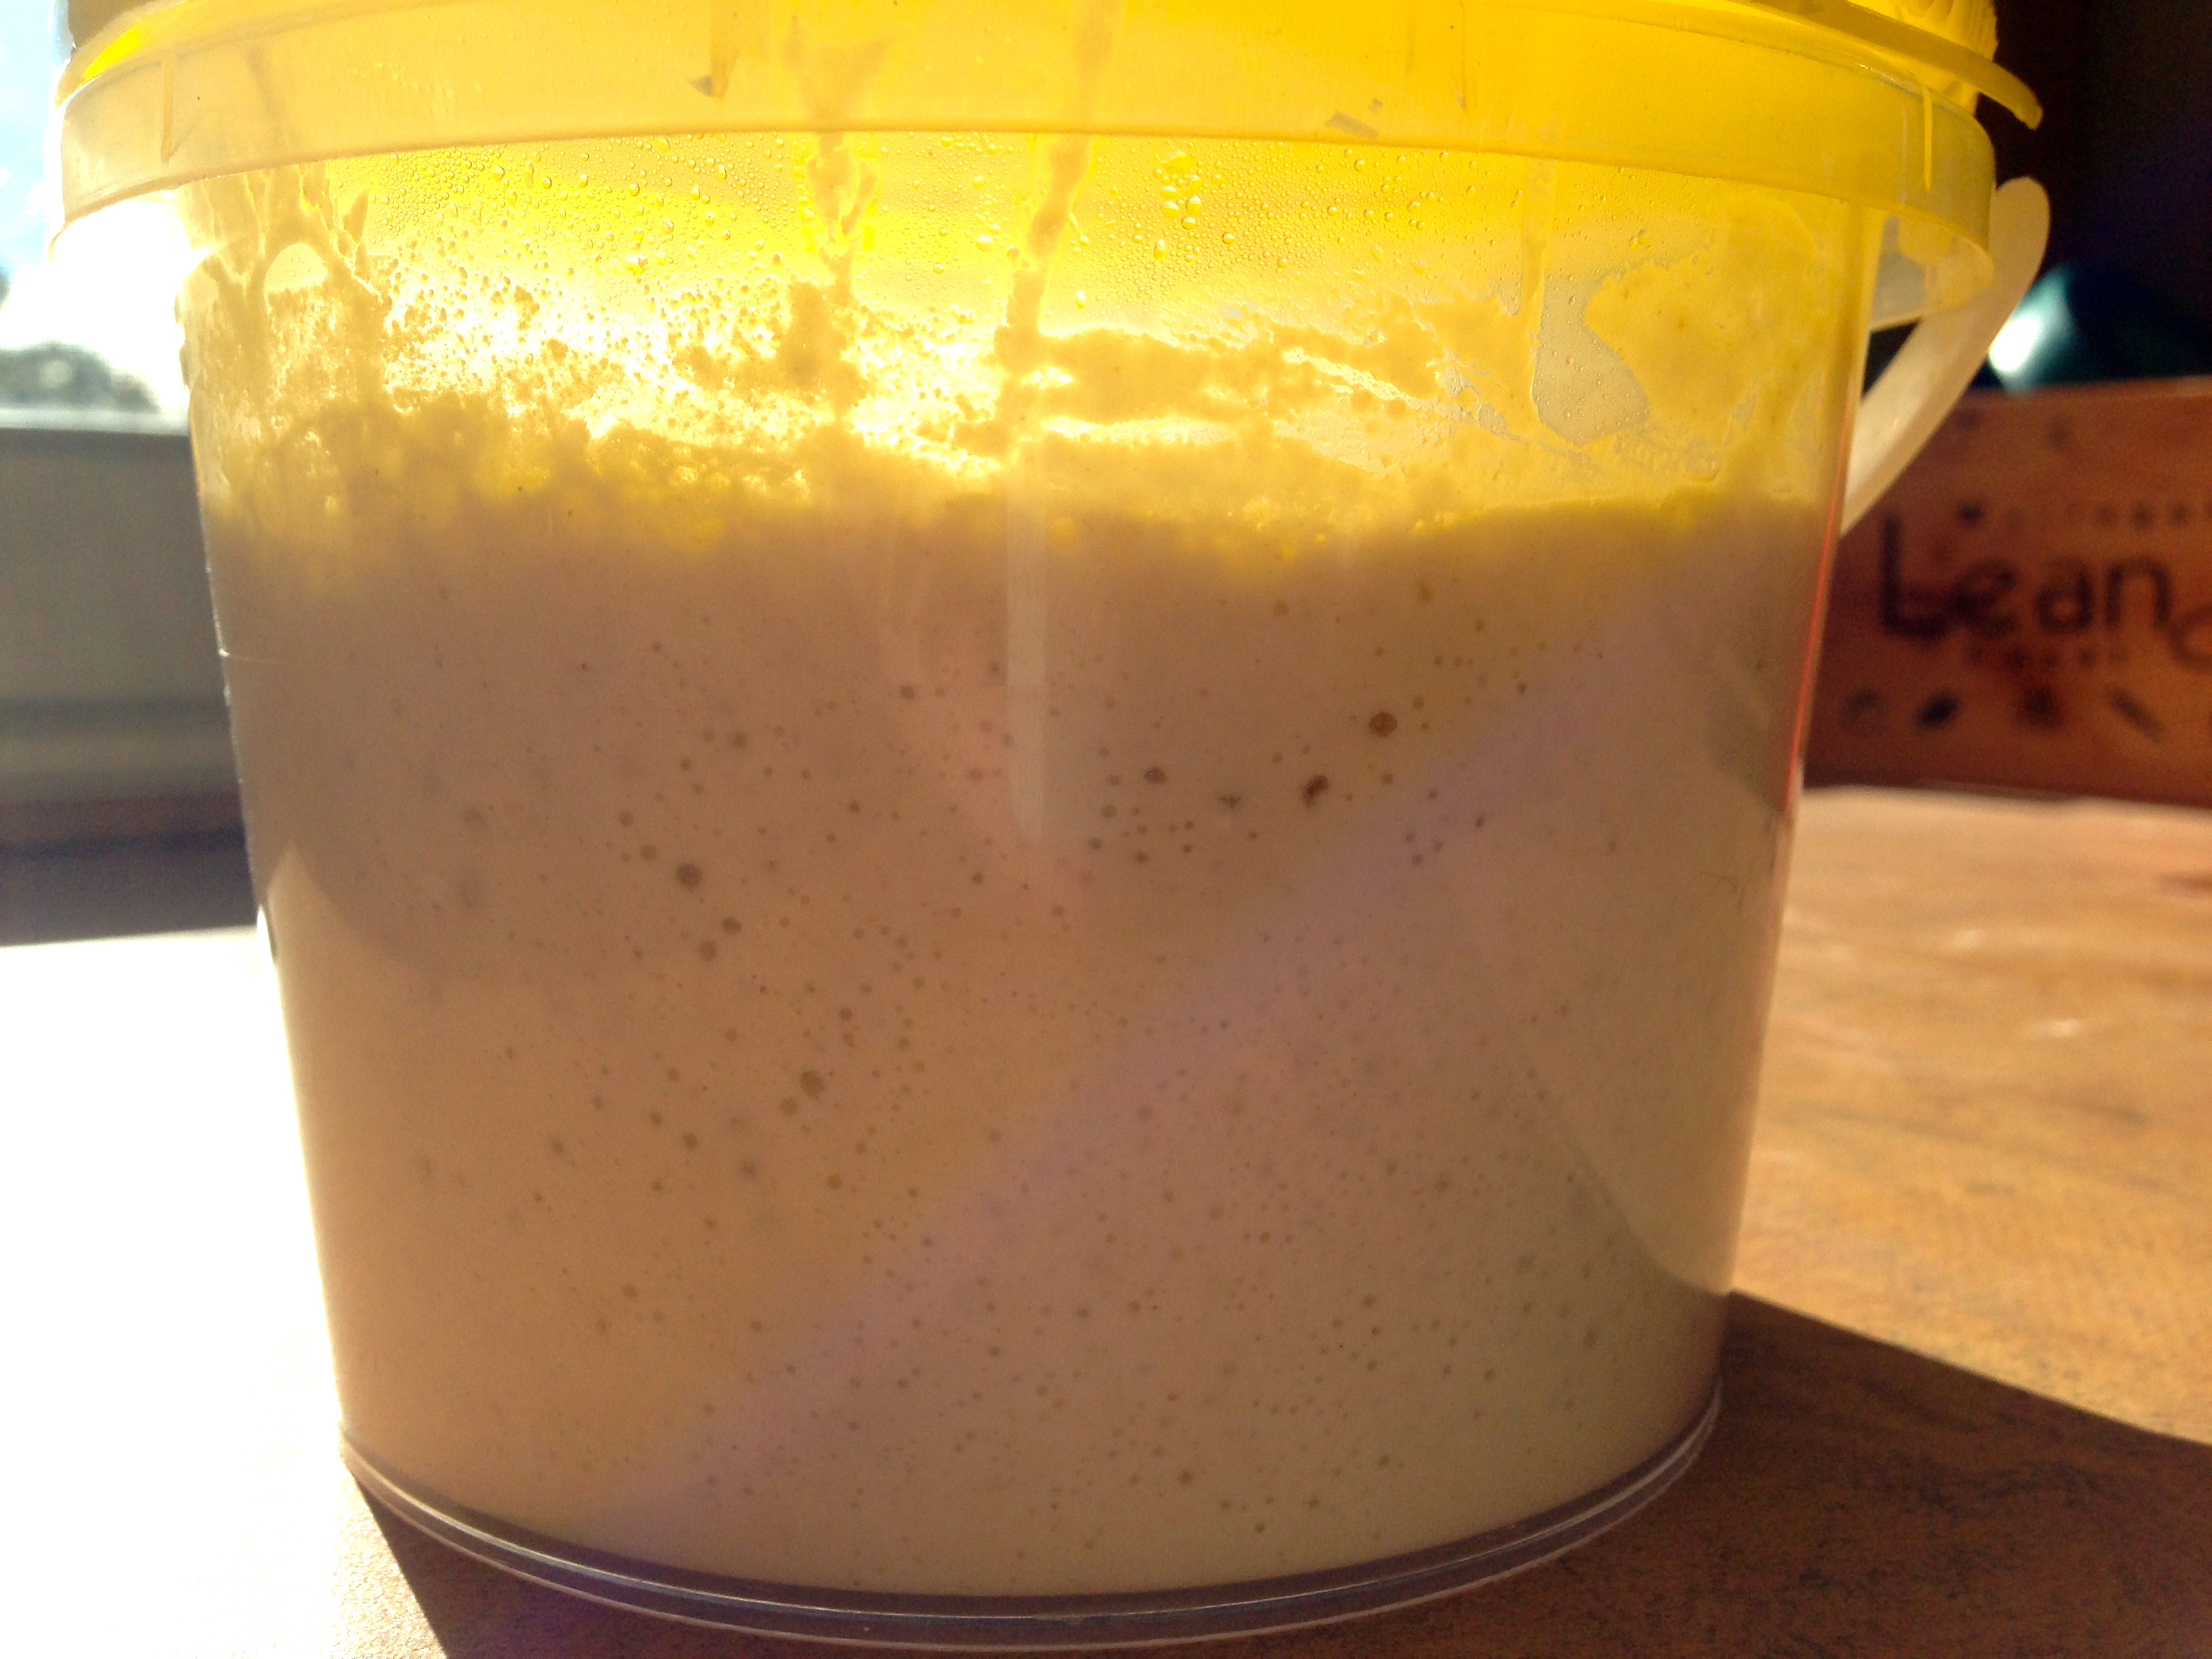
Place starter, flour and water in the mixer’s bowl. Using the dough hook attachment kneed on low speed for a couple of minutes until all ingredients are combined. Increase the speed to medium and knead for another 6 minutes. Turn off the mixer and cover the bowl with a damp tea towel, or cling film, and let the dough rest for 20 minutes.
Sprinkle the dough with the sea salt and mix again on low speed until the salt is incorporated. Increase the speed to medium and mix for another 6 minutes. The mixing time may need to be increased. The dough is ready once it can be stretched out easily without the dough breaking apart. It should almost be transparent. This point is very difficult to reach by hand kneading…just ask James.
The dough is now ready to be set aside for an hour for its first bulk prove. Place the dough in an oiled container and cover with plastic wrap. At the end of the hour lift the dough out and fold it back on itself a couple of times, this is called the “knock back”. Put back in the oiled container and bulk prove for a further hour.
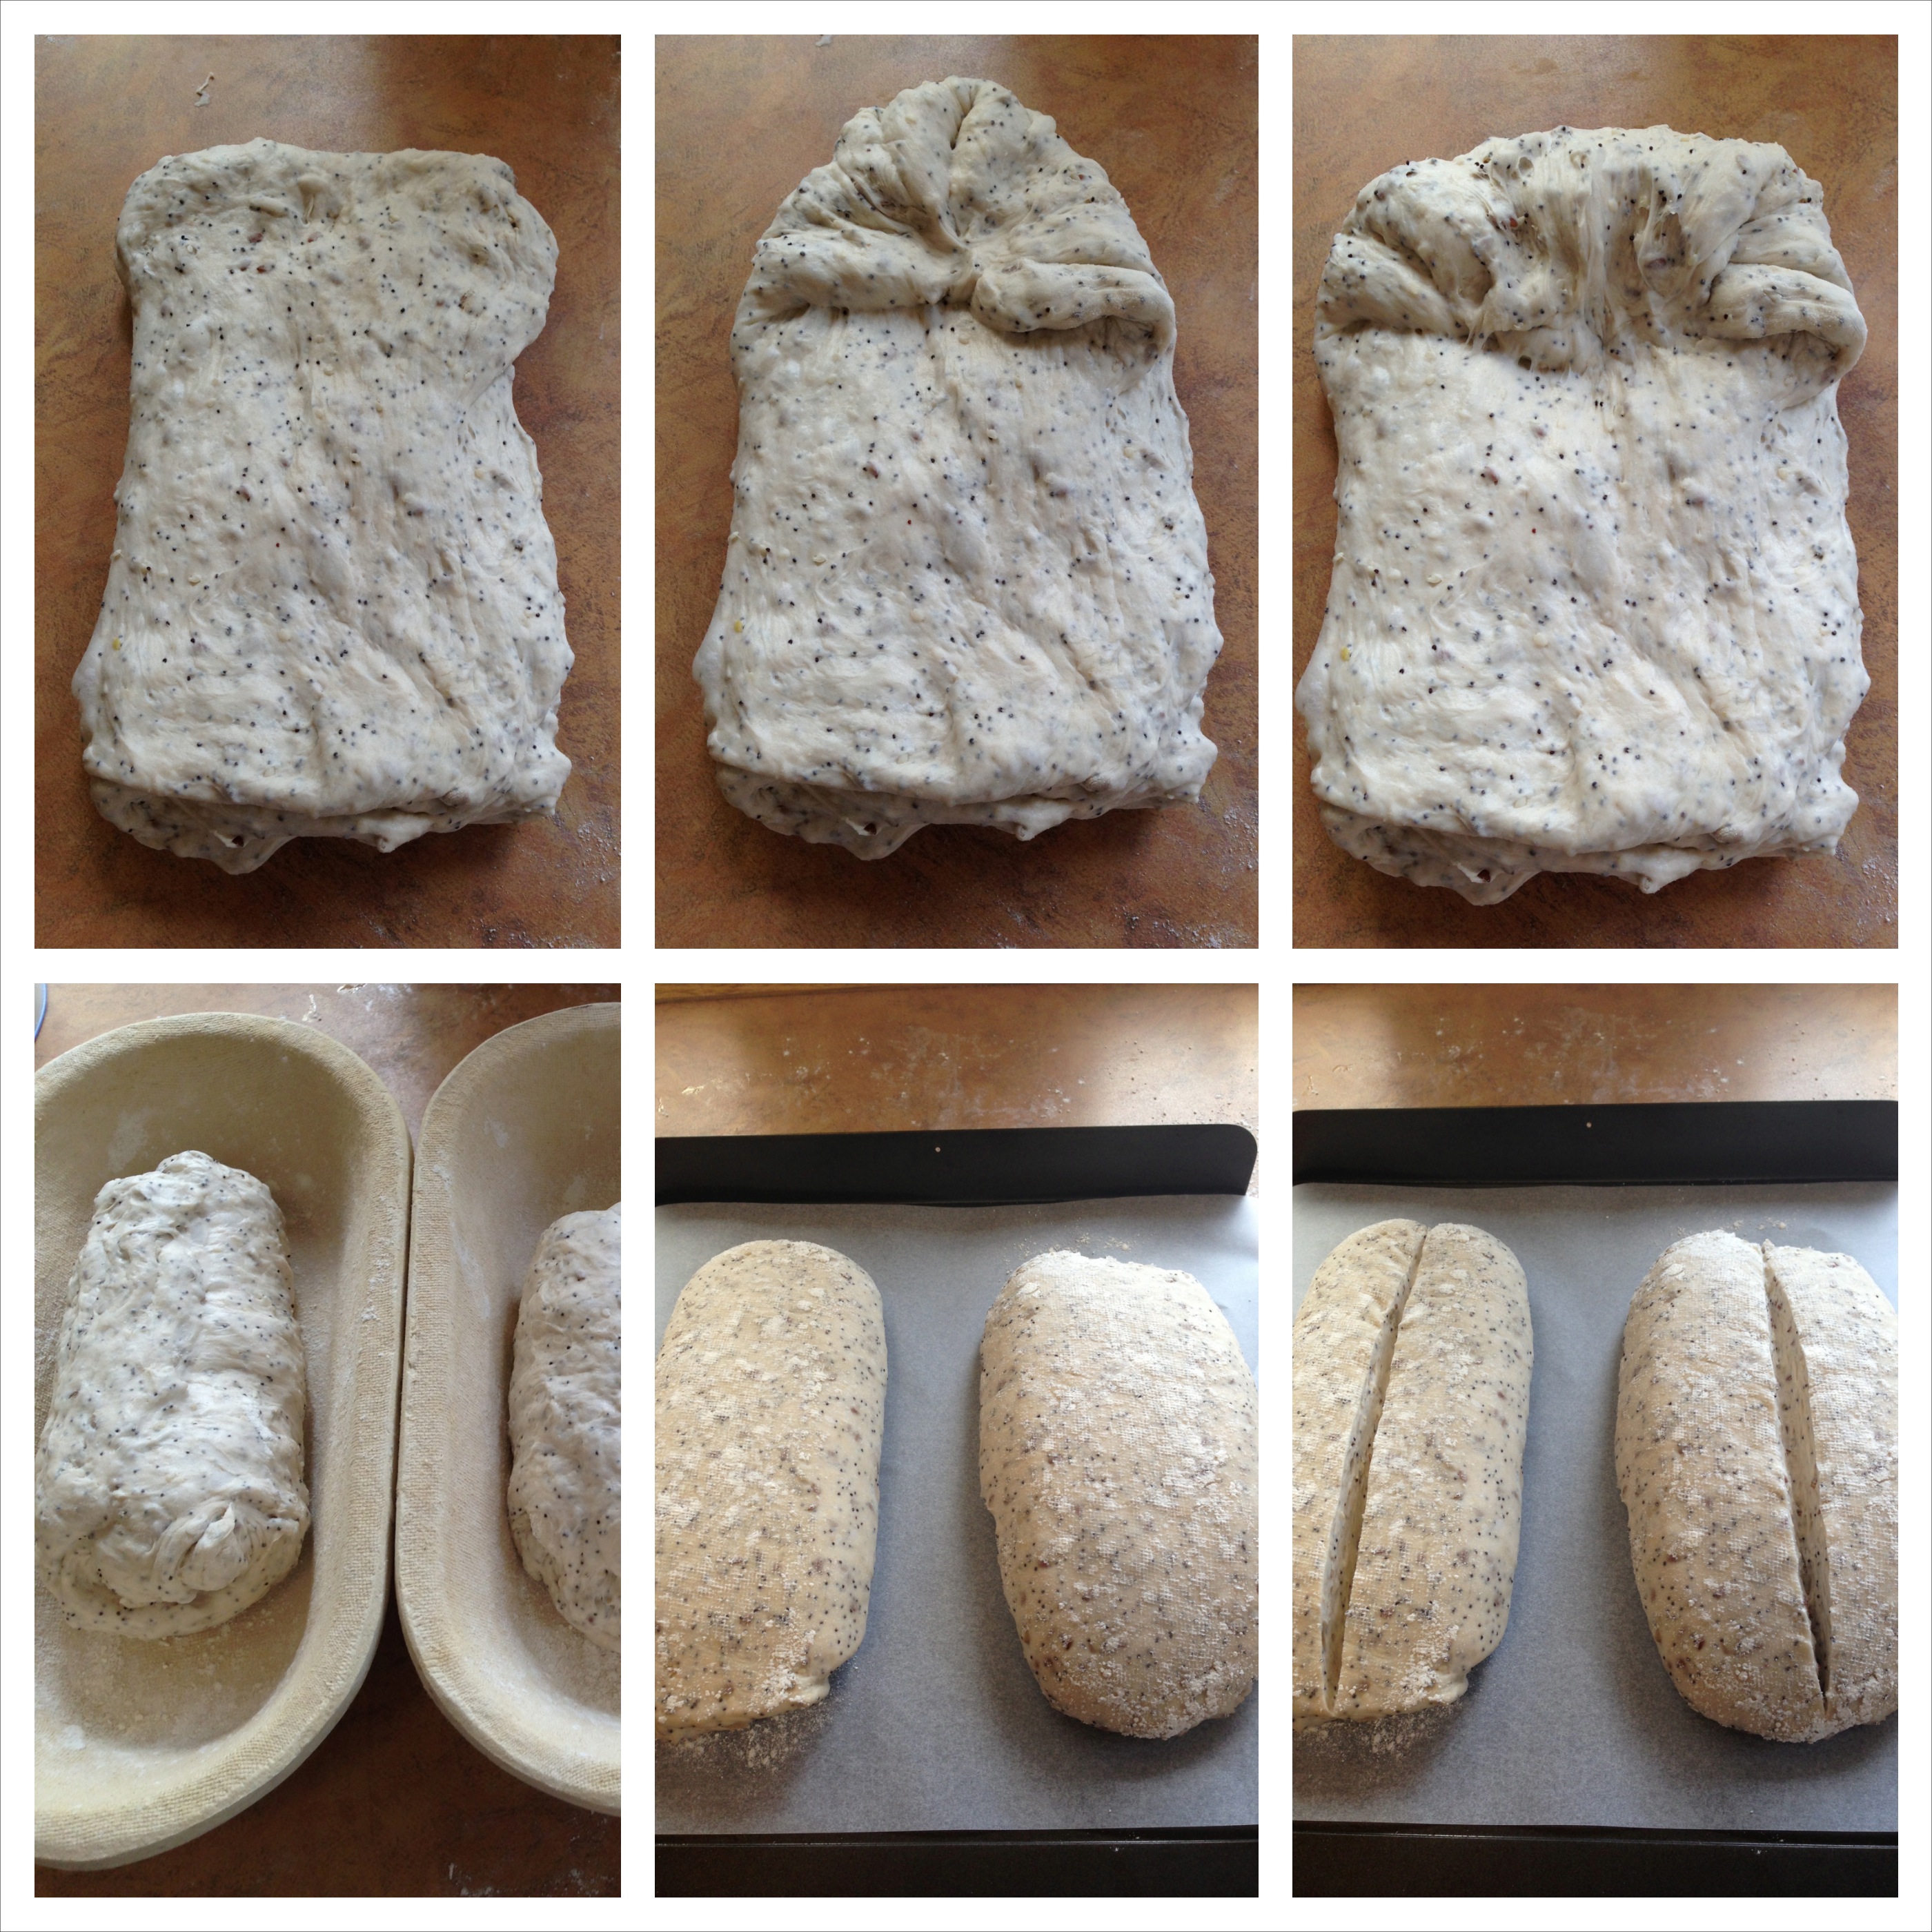
Divide the dough in two with a blunt dough splitter. Working with one piece of dough at a time, stretch it out to a rectangle. Fold it in thirds like you would a letter before putting it into an envelope. Then fold into thirds again, starting from the top end. Now the dough is ready for shaping. Starting at the top edge fold the corners in to form a point, just like you would when folding a paper plane. Roll the point back into the dough and keep rolling towards you, pushing down at each roll so there’s no air trapped in between the rolls. Place the loaves, seem side up, in the proofing baskets. If you do not have a proofing basket (like most) use a baking dish or basket lined with a floured tea-towel. Cover with a plastic bag and place in the fridge for 8-12 hours (overnight).
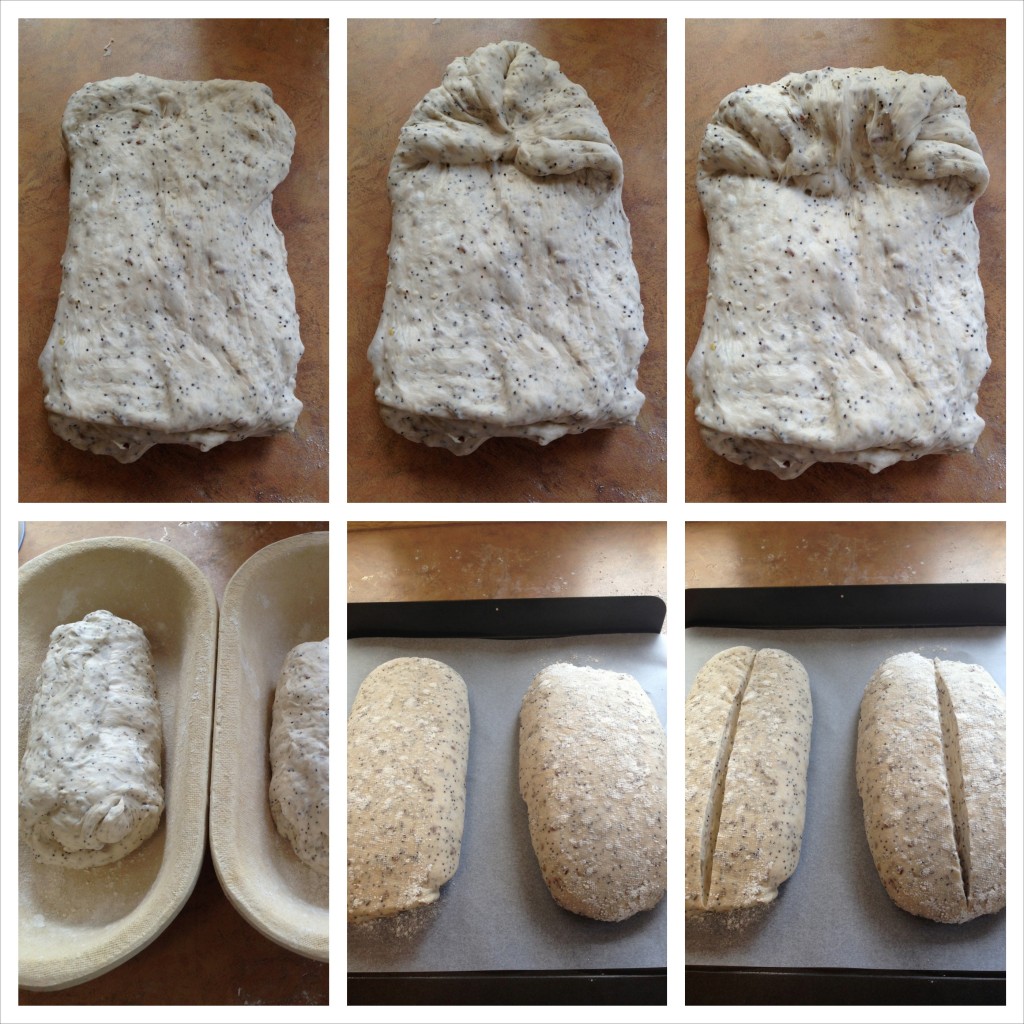
Folding the dough to form loaves. I used kaipseeds in this mix which explains the grains!
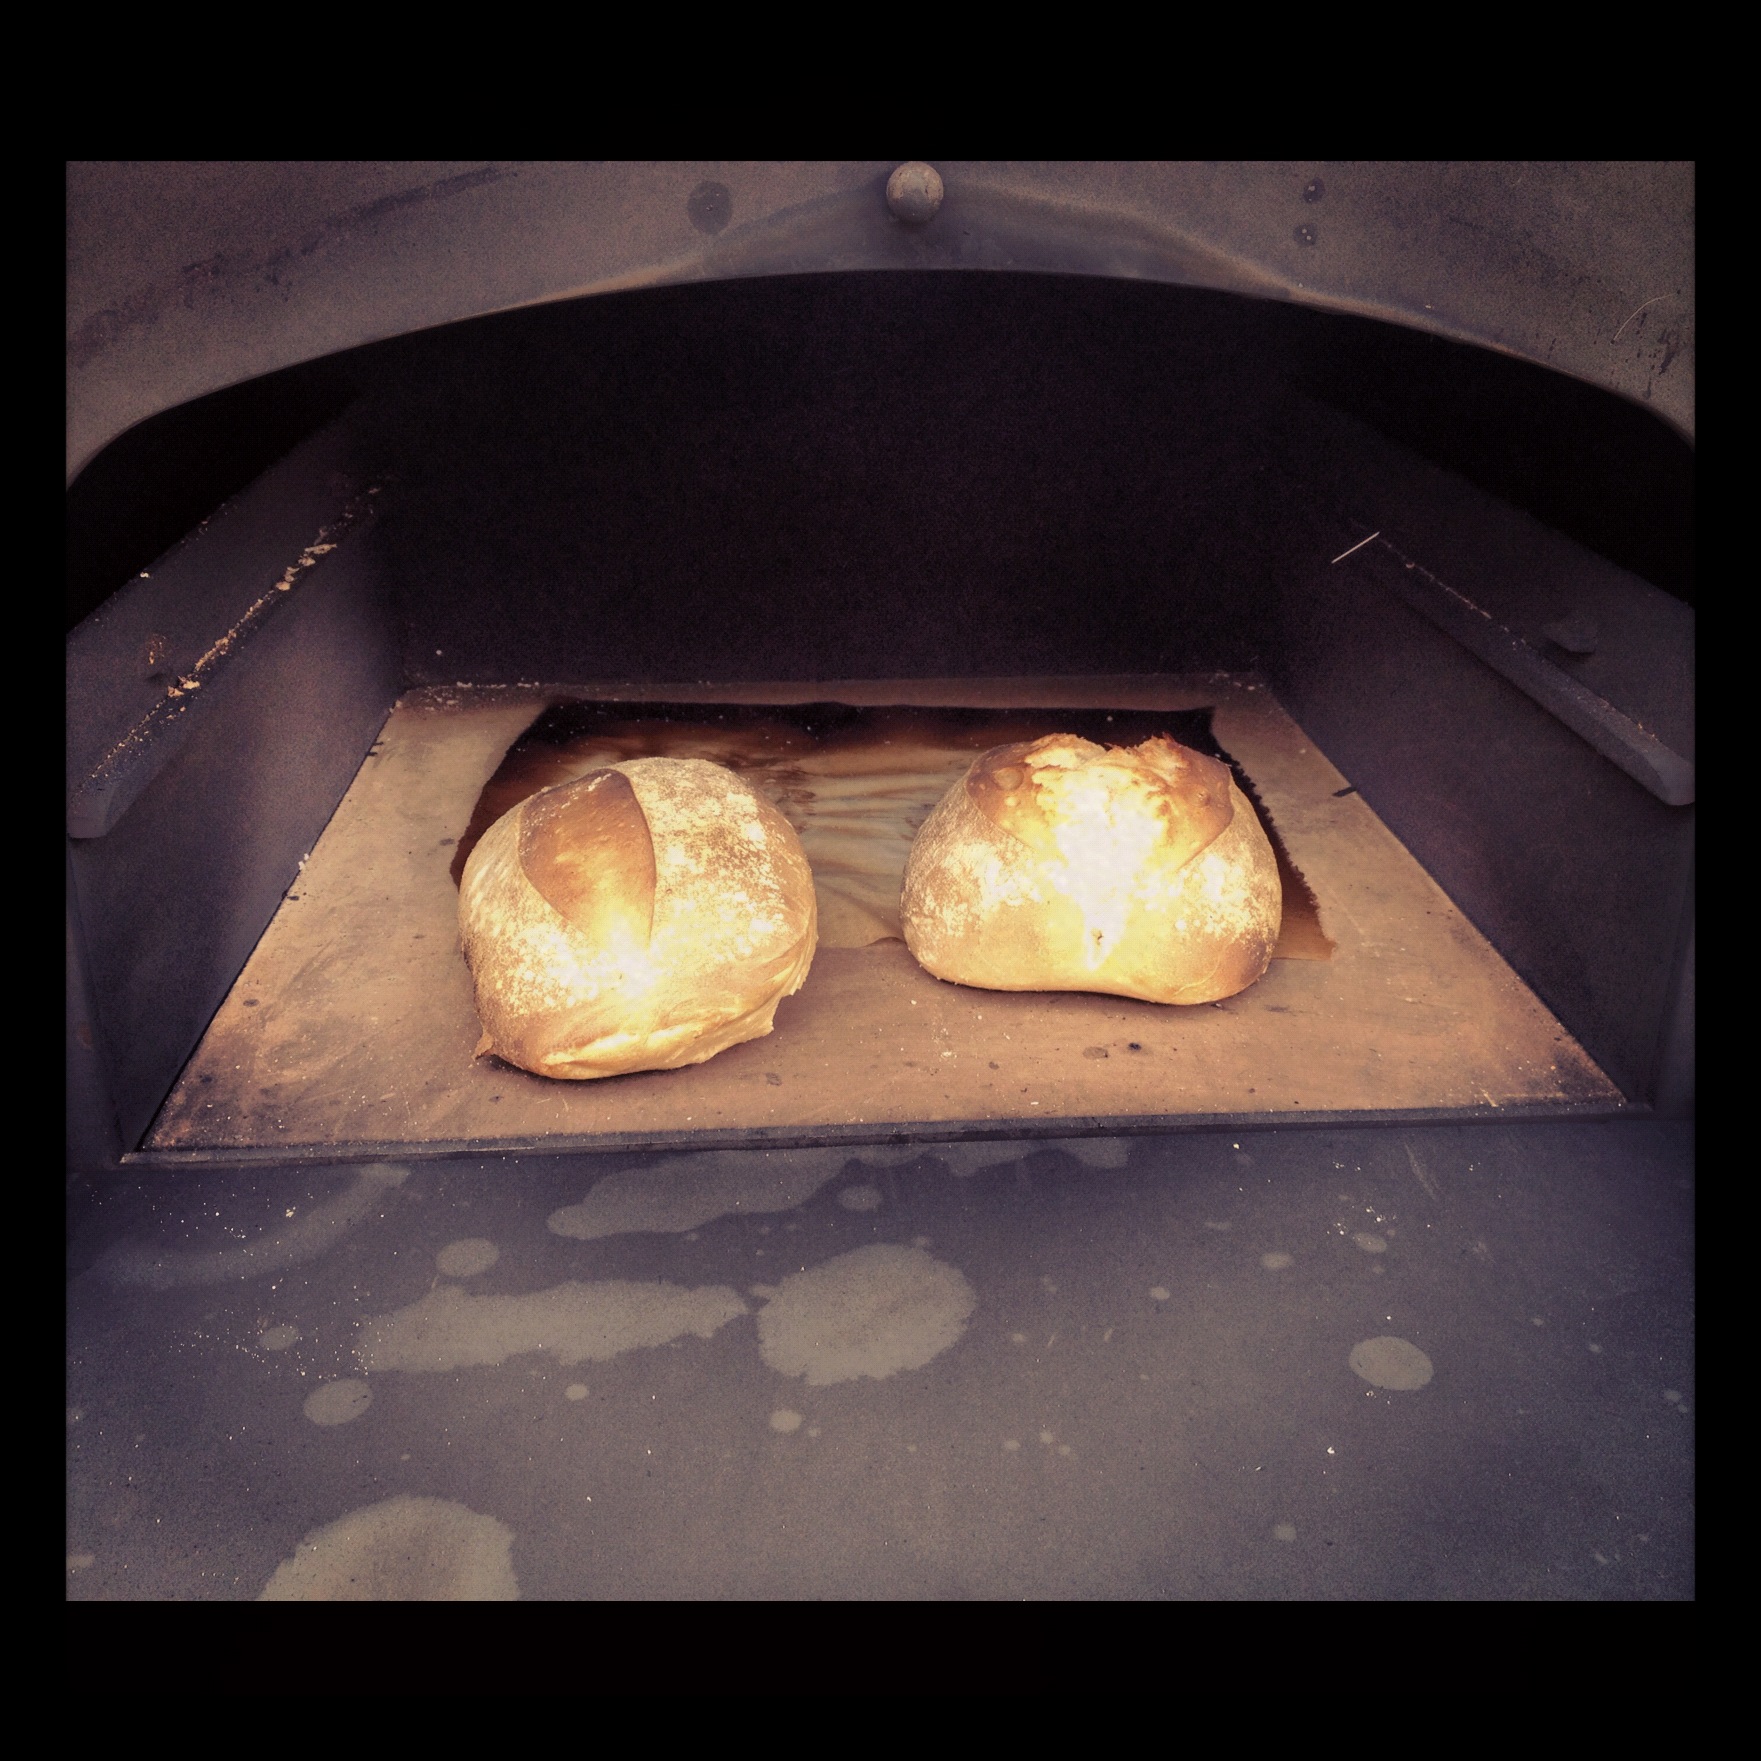
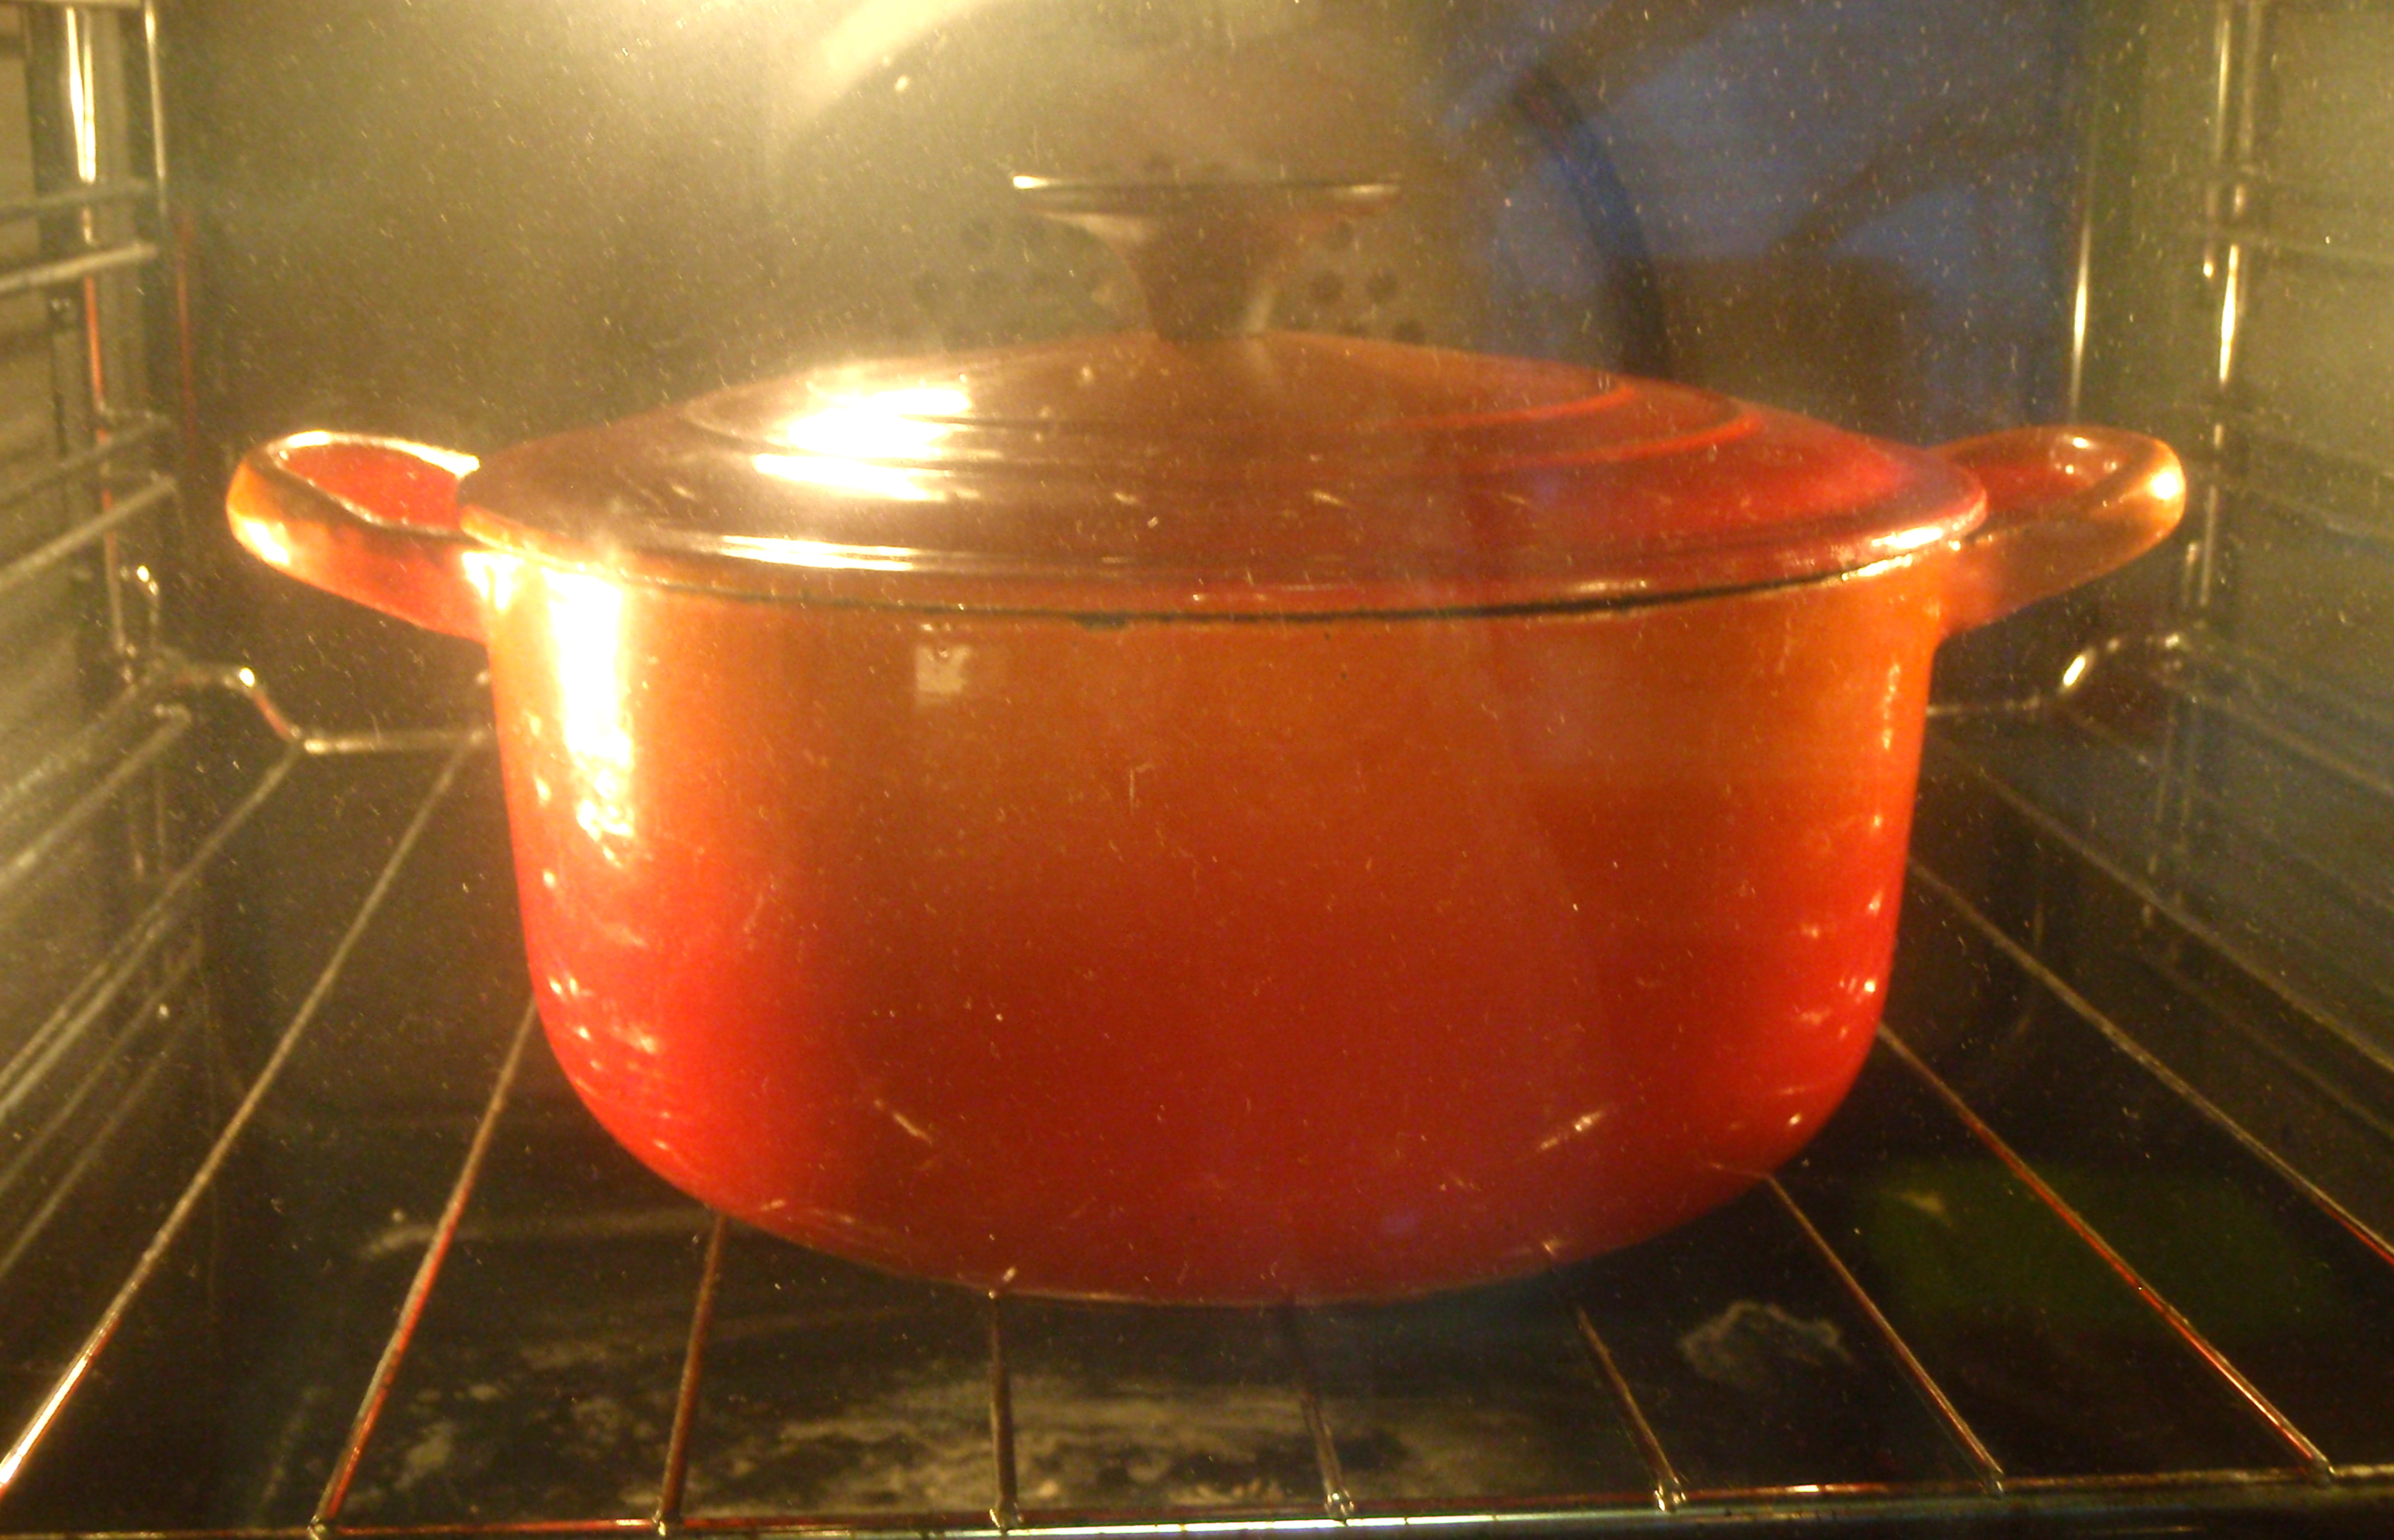
Next day, remove the loaves from the fridge and let rise in a warm, draft-free spot. The loaves should increase in size, this will take about 1 – 4 hours. While this is happening preheat the oven to it’s highest temperature. We have a wood-fired oven which I get up to about 300°C. When I was using my kitchen oven, baking the loaves on a pizza stone, the oven could reach about 275°C. The loaves are ready to bake when you push on the dough and it bounces back – leaving no trace of your fingerprint. If the dough collapses once pushed the loaf has over-proved and needs to go in the oven ASAP. Once ready remove the loaves from the proofing baskets. Gently does it, you don’t want to bump any of the air out of the loaves.
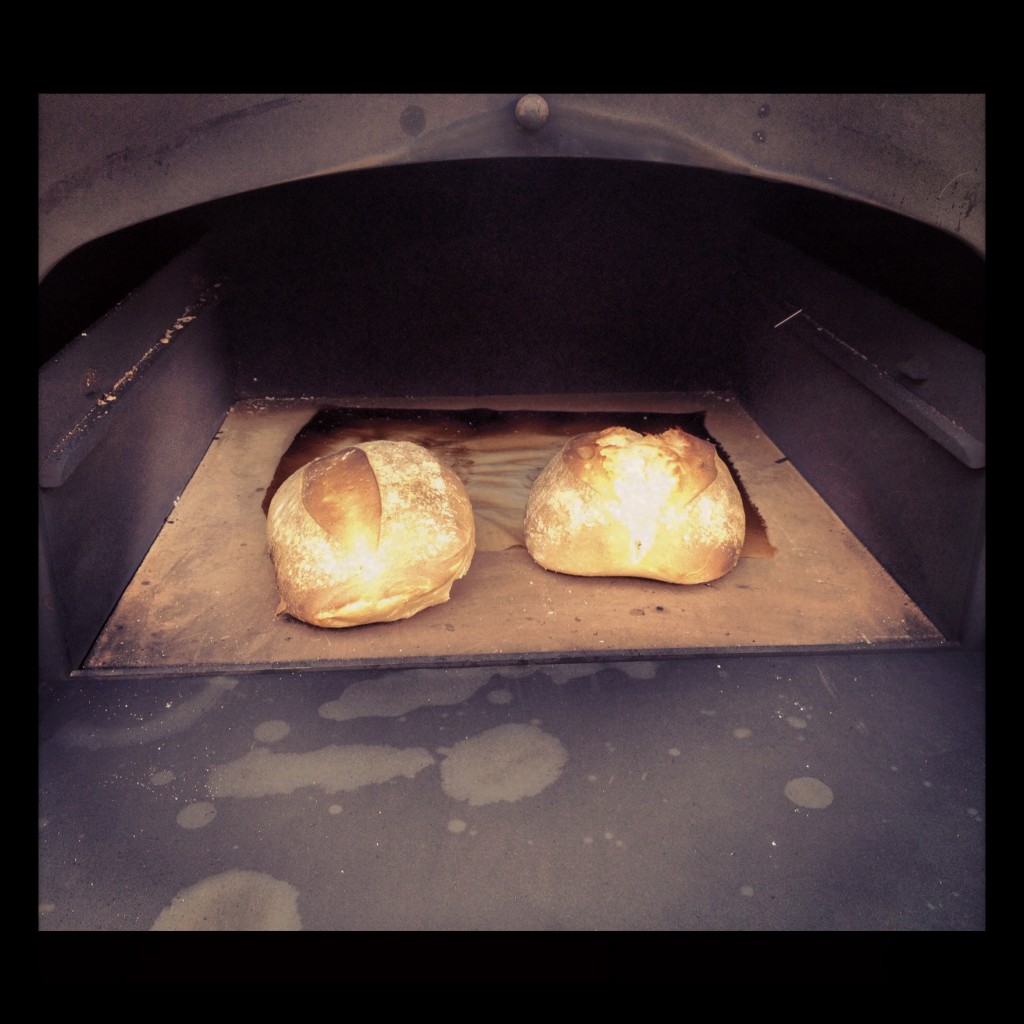
Just before putting in the oven slash the loaves down the middle with a serrated knife (however, do not slash if over-proved). Get the loaves into the oven immediately after slashing them. As the loaves go into the oven put a couple of ice blocks on the base of the oven. This will create a humid environment in the oven ensuring the loaves will not crust up too quickly, allowing them to rise to their full extent. The loaves will take about 30 minutes to cook, however, keep an eye on them every 10 minutes. Cooking time will vary between ovens. The loaves are cooked properly when they sound hollow once tapped on the base.
Allow the loaves to cool for 20 minutes and enjoy a slice with butter and any other spread you prefer…maybe some marmalade!

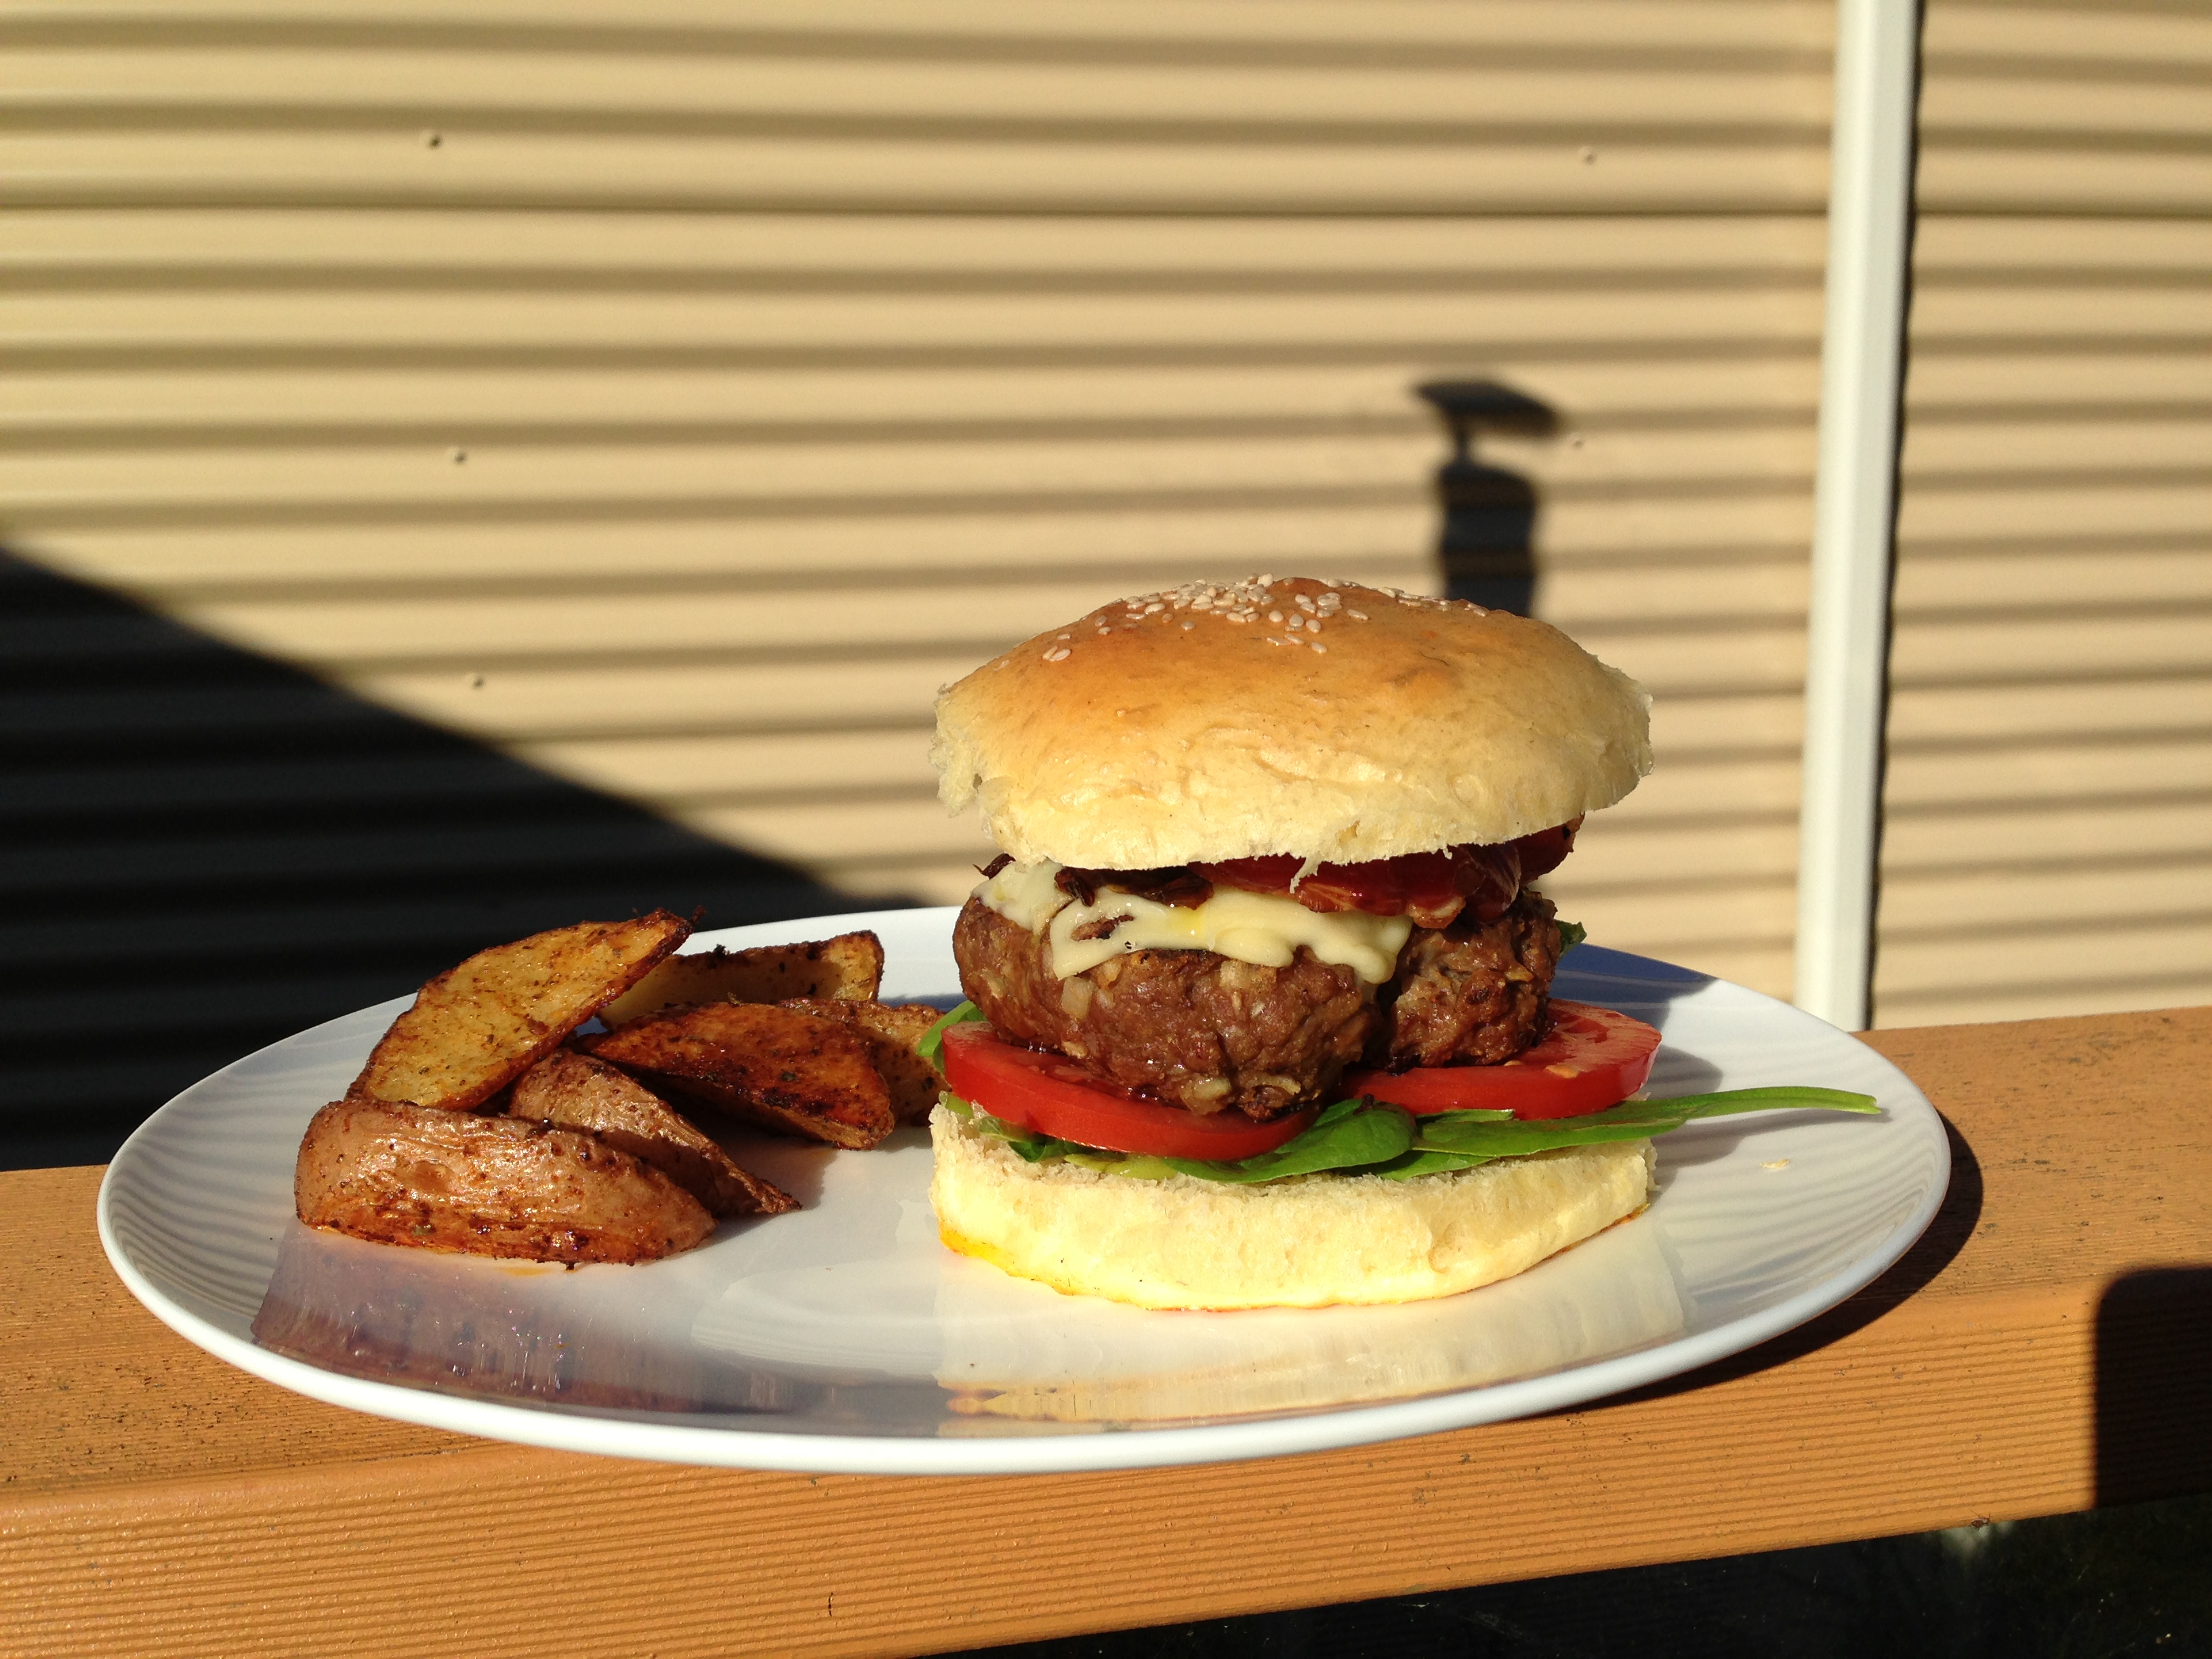
 The humble burger seems to be getting around in a brioche bun these days. It’s light and fluffy and has a slight sweetness to it. Andy’s been dying for one so we gave it a go on the weekend. I haven’t made brioche before and was surprised at how well it turned out. It was really very simple. The recipe I was looking at, which Dad took home from a cooking class at Libertine, had a lot of sugar in it. It seemed too much for our savoury purpose, so I halved it.
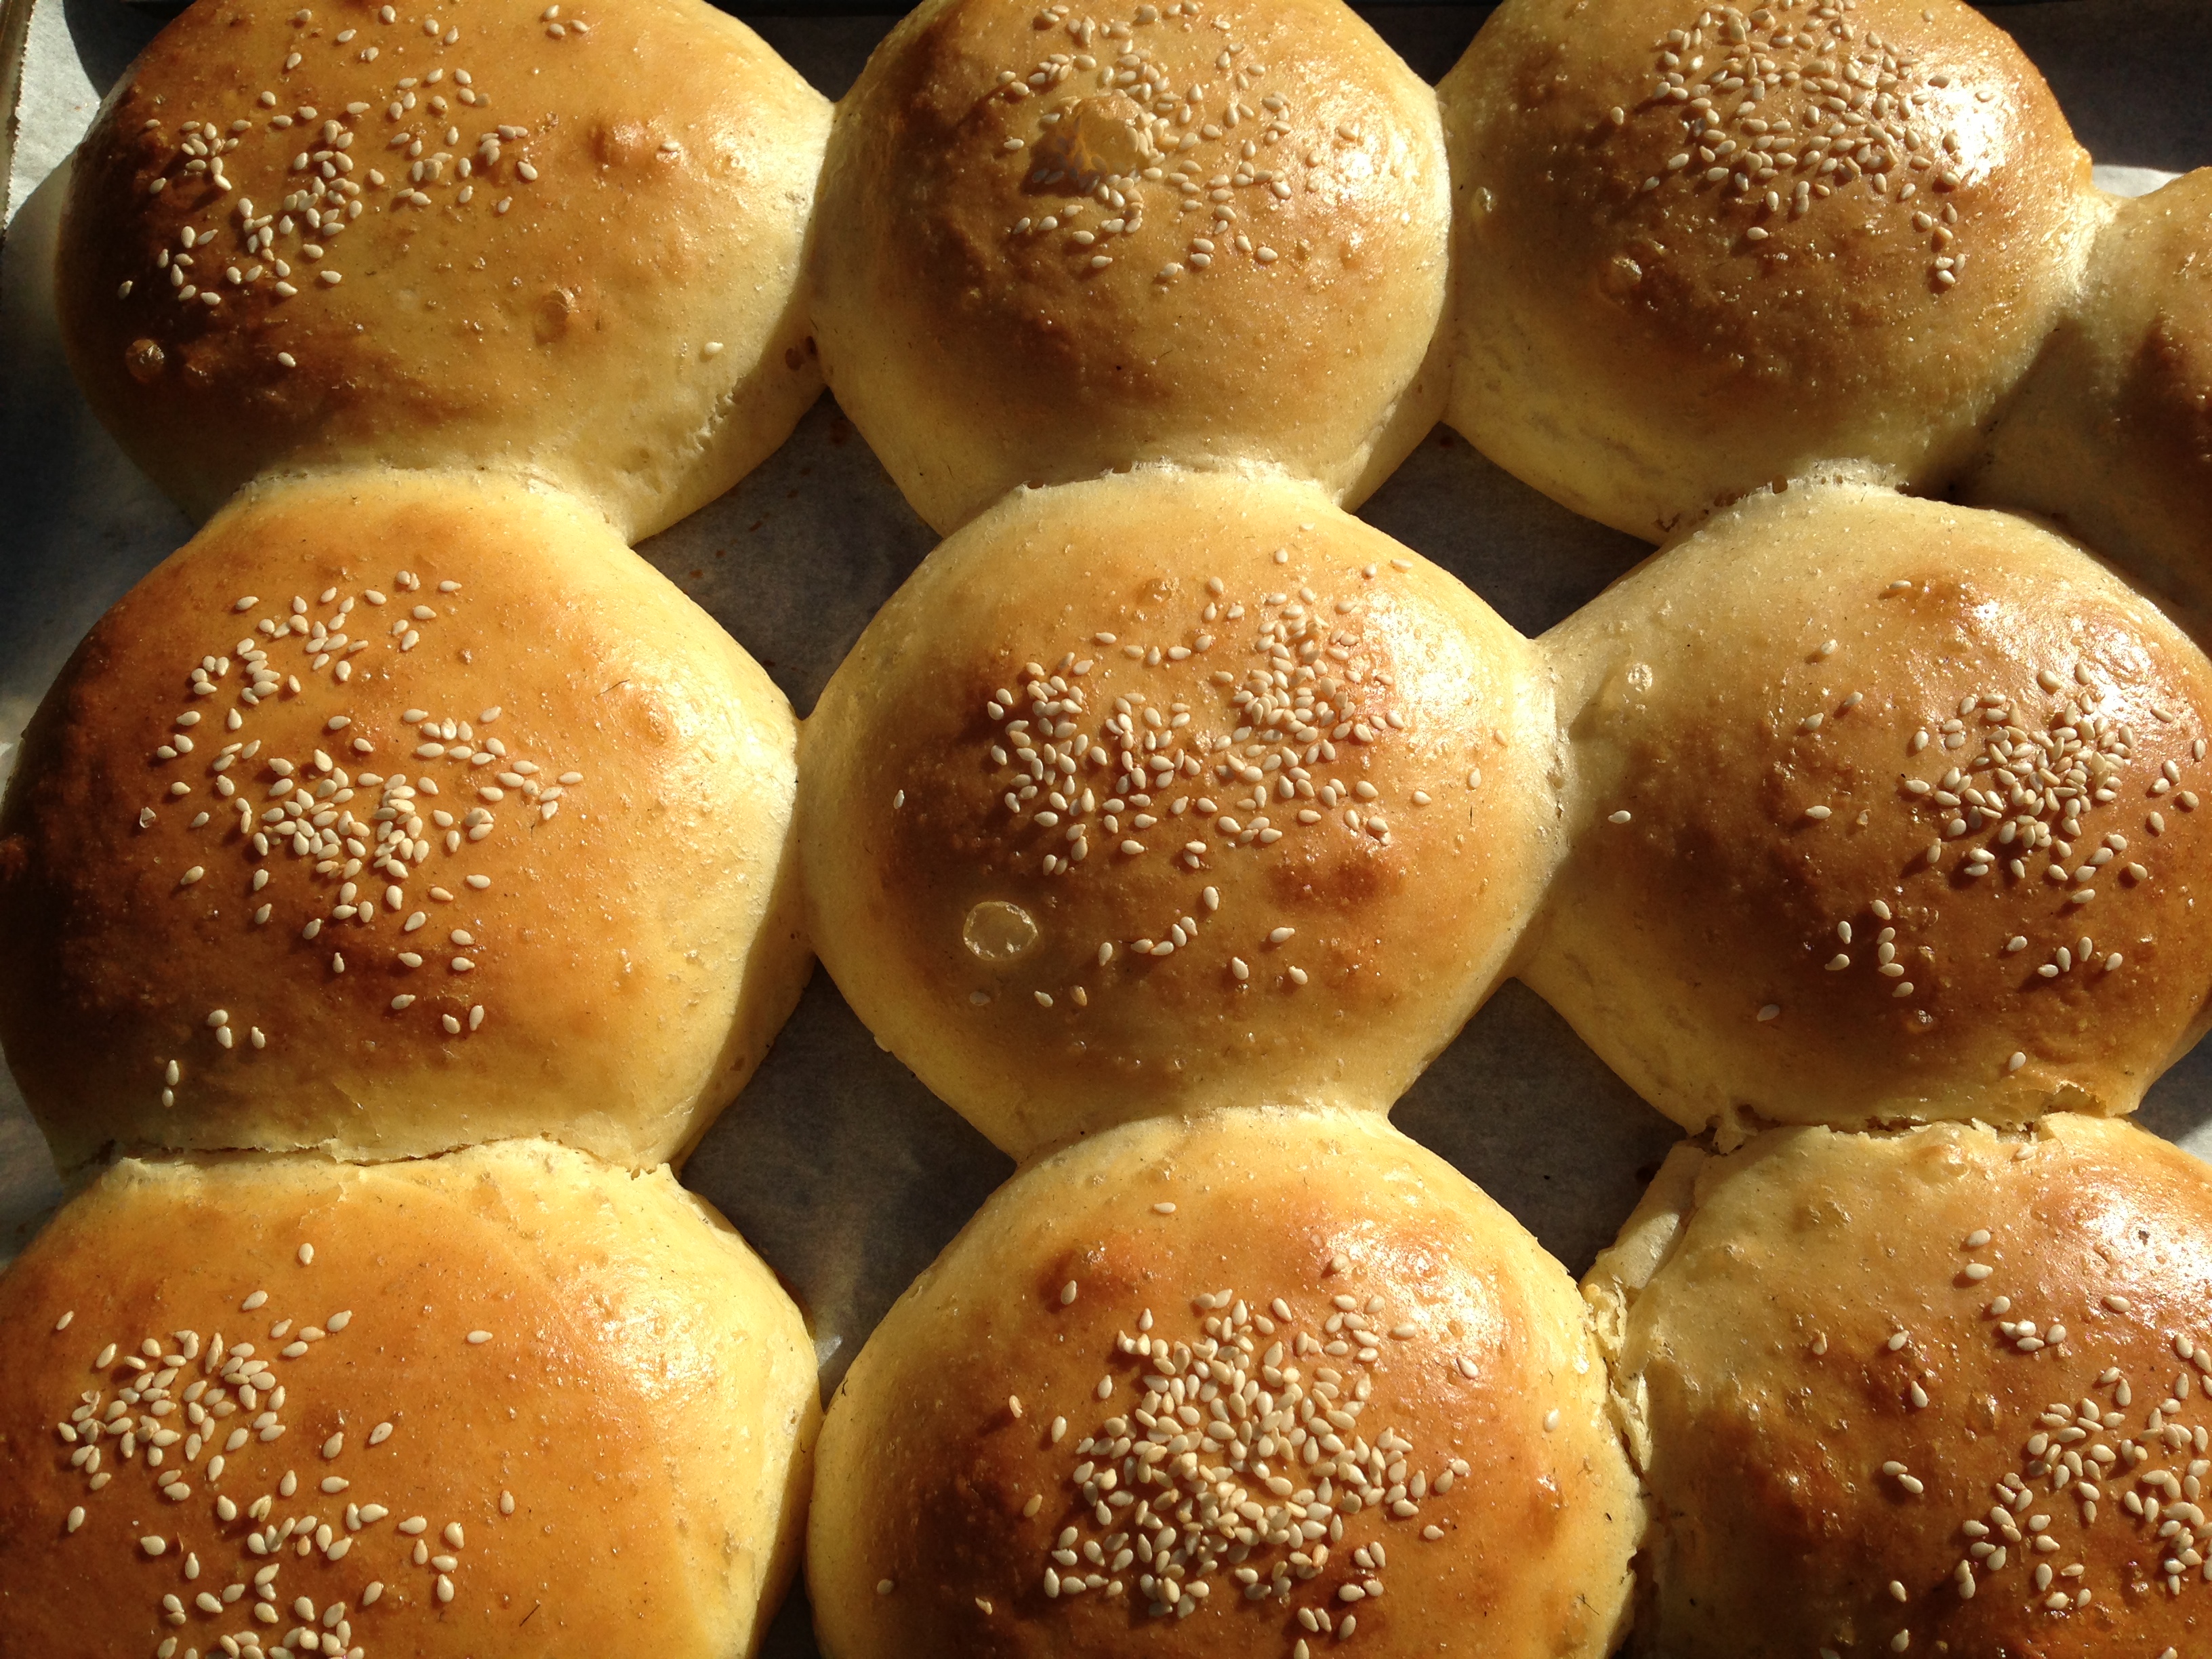
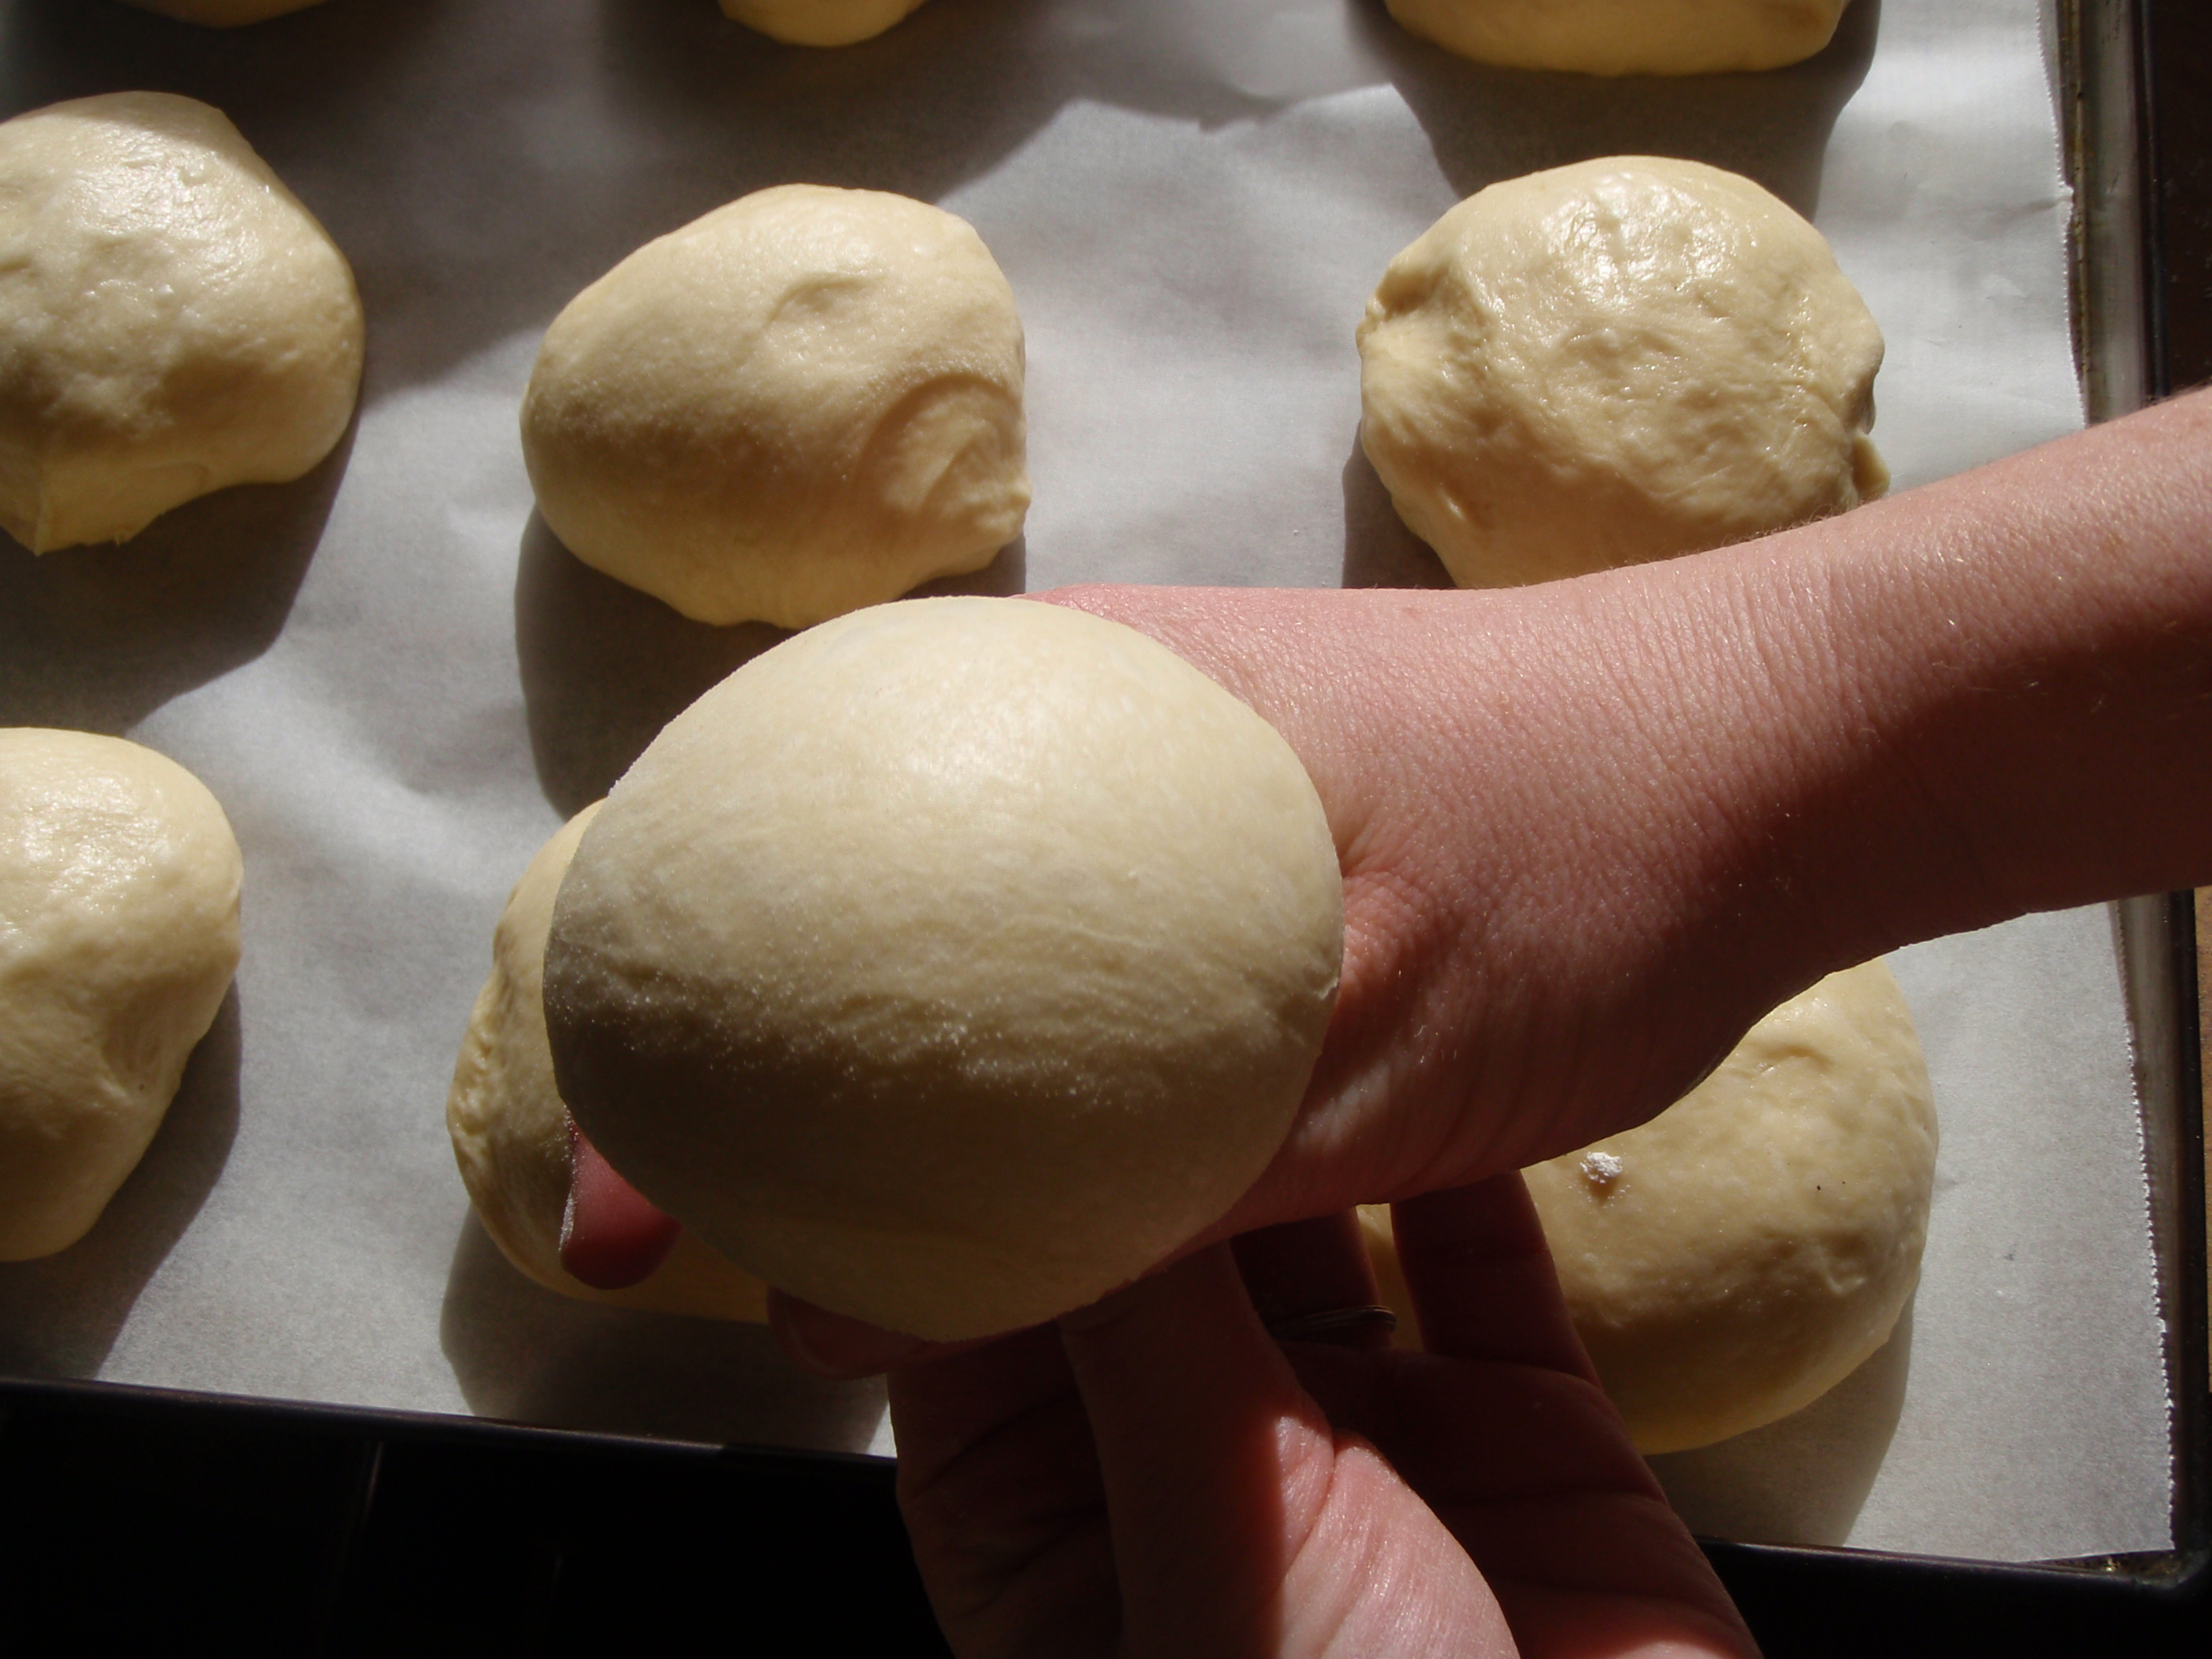 Prove in the bowl for 30 minutes. Remove from the bowl and place on a floured bench. Divide into 12 portions and shape into balls. I create a circle with my thumb and index finger on one hand and push the dough through with the other. This creates a nice uniform ball. Place the balls on a baking paper lined tray, evenly spaced. Cover with a damp tea-towel and allow to rise for about 2 hours, or until doubled in size. Brush with egg wash and bake for 15 minutes. The buns should be golden and sound hollow when tapped on the bottom.