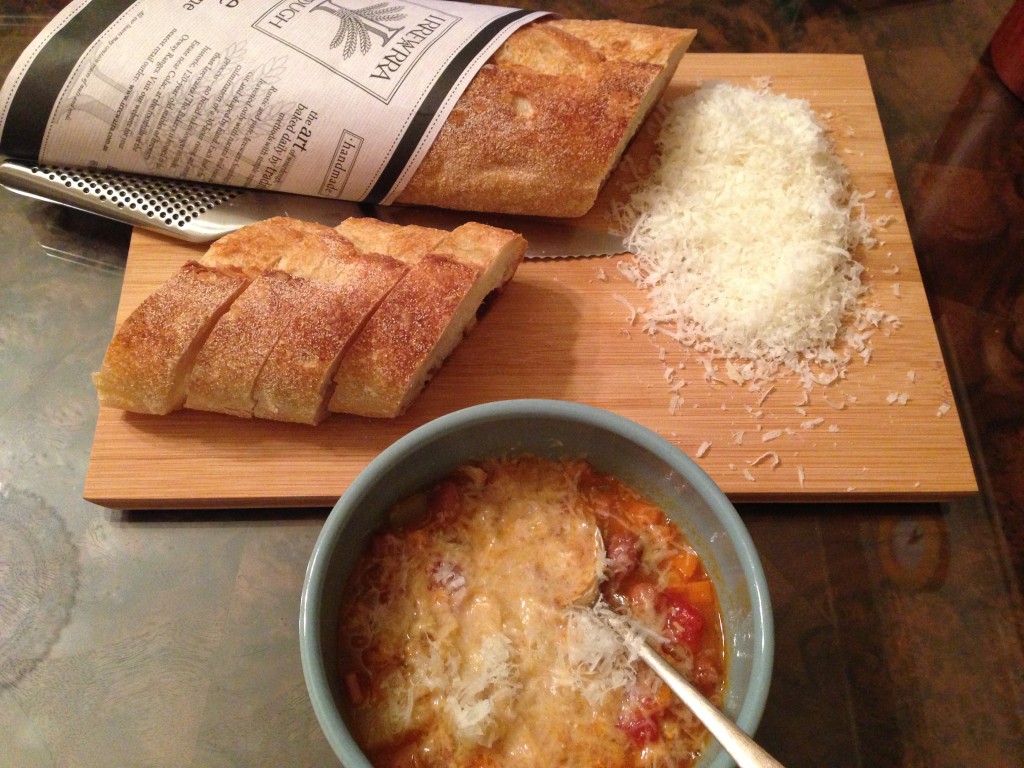
Farro & Bean Soup

IMG_4334The soups keep coming for winter. The thing I’m loving most about soup at the moment is that one batch will last a couple of meals for the two of us. Nothing like a night off cooking when you’ve got a newborn…or anytime! This is just like a minestrone but with a couple of extras, the beans and faro. This recipe has evolved from Guy Grossi spelt & bean soup recipe.
I have served it here with some crusty bread…delicious!
Serves 4

Ingredients
2 tbsp olive oil
1 small onion, finely diced
3 cloves garlic, finely chopped
1 carrot, finely diced
1 celery stick, finely diced
1 capsicum (any colour), diced
1 parmesan rind
1 can chopped tomatoes
1 potato, 1 cm dice
1 can borlotti beans, drained
1 can cannellini beans, drained
500ml chicken stock
100g farro
1 bunch parsley, finely chopped
Grana Padana or other parmesan cheese, grated

Method
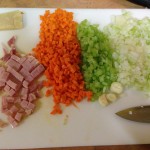
IMG_4331Heat oil in a large saucepan over a low-medium heat. Add onion and sauté for 2 minutes then add carrot, celery, capsicum, garlic, potato and parmesan rind. Cook for 5 minutes, stirring occasionally. While this is cooking down drain and rinse the borlotti and cannellini beans. Divide the beans in two and mash half the beans and set the other half aside.
Add tomatoes, mashed beans and chicken stock and cook for 20 minutes. Then add the whole beans and farro and simmer for a further 20 minutes until the farro is tender. Remove the parmesan rind and stir through the chopped parsley. Serve with grated Grana Padana.


Chicken & Sweet Corn Soup

IMG_4457
I never used to like soup. My standard line was, “I don’t like drinking my meals.” These days I have come around to the idea of soup, but I do prefer the chunkier ones. This one has some good weight to it. Of course, you could make it finer or chunkier depending on your preference. But, winter is here so I thought it was time to get back into soup making. The genius thing about soups is that if there’s just two of you, one batch of soup can last for several meals – perfect when there’s a new bub in the house!
Serves 6

Ingredients
1 litre chicken stock
2 chicken breasts
1 tbsp soy sauce
2 tsp finely grated ginger
1 tbsp cornflour
1 420g can creamed corn
1 300g can corn kernels, drained & rinsed (or fresh if you have it)
100g ham, finely diced
2 egg whites
1 tsp sesame oil
6 spring onions, finely sliced

Method
Start by poaching the chicken. Put the chicken stock (cold) and chicken breasts in a large saucepan and bring to the boil. Once boiling reduce the heat to low and simmer for 5 minutes, or until the chicken is cooked through. Once cooked remove the chicken from the stock and set aside to cool for 5 minutes. Once cooled, shred the chicken to your liking.
Make a paste with the cornflour and a bit of the chicken stock (about 50 mls), adding the stock slowly. Add the soy sauce, ginger and cornflour paste to the stock and stir until the mixture starts to thicken (about 2 minutes). Add the corn, creamed corn, shredded chicken and ham and cook for a further 2 minutes.
In a small bowl lightly whisk the egg whites. Add them to the stock, stirring constantly. White ribbons should form as the egg whites cook through. Remove the soup from the heat.
Finally add the sesame oil and spring onions. Season with salt and pepper to taste.
Serve hot with some nice crunchy toast – you could even make your own sourdough!

If you’ve enjoyed this post please “like” it on Facebook, or even share it. Thanks! x

Naan

IMG_4013
We love naan but it’s not very easy to find in the supermarket (or good ones at least) when you’re making your own curry at home. And surprisingly it can quite often be disappointing from Indian restaurants, even if the rest of the meal is delicious. Andy has attempted naan before and it turned out like stodgy cardboard – yep, it really tasted as good as that sounds! I’ve always put it in the too hard basket until I received Short & Sweet: The best of home baking  by Dan Lepard from my brother-in-law & partner for my birthday. I came home from work and gave it a crack, the only trick is that it needs proving time so I had to start fairly promptly once arriving home if we were going to eat the naan with dinner rather than have it for dessert.
It might seem like a lot of ingredients but there’s really not much to it, just throw them all into the mixing bowl. I used half this quantity as there was just the two of us eating and we managed to get 4 decent sized naan out of it. The original recipe caters for only 4-6 naan for a full batch but they must be super big…too big for our frying pan. You can make plain naan or brush it with a little garlic butter, sprinkle with different seeds, it’s up to you, but start with the basic recipe and you can decide if you want flavourings later as you only add those during cooking.
Makes 8

Ingredients
100ml cold milk
125g low fat yoghurt
50ml boiling water
1tsp dried yeast
300g plain flour, plus extra for dusting
50g wholemeal flour
0.5tsp bicarb of soda
0.75tsp sea-salt
1tsp sugar

Method
Combine milk, yoghurt, boiling water and yeast in the bottom of a mixing bowl. Add the rest of the ingredients and kneed until combined – I use my Kitchen Aid but you can easily knead by hand. It should be a soft sticky dough. Cover with cling film and prove for 30 minutes in a warm, draught-free place. Knock-down the dough (knead lightly) and then continue to prove for a further hour.
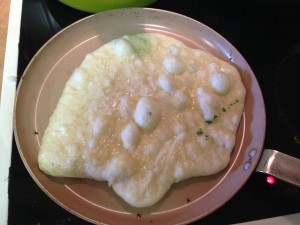
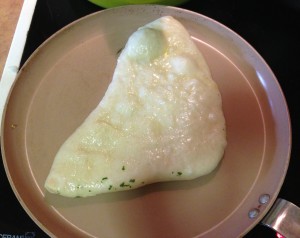
Lightly flour the bench top and tip the dough onto it. Divide the dough into 8 even portions. Working with one at a time roll out the dough until about 2-3 mm thick. The original recipe says to roll out to 1-2cm thick, however they puff up hugely in the pan and they were too thick and stodgy for our liking. The thin versions were still light and fluffy on the inside and crispy on the outside.

Rolled to about 2mm thick, it's much lighter

Rolled to about 2mm thick, it’s much lighter

Rolled to 1cm thick it was very puffy!

Rolled to 1cm thick it was very puffy!

Heat a large frying pan on a moderate heat and cook the naan one at a time. Each naan only takes a few minutes on each side. If adding flavour do it now. When you first put the naan in the frying pan brush it with whatever you like. In this instance I had crushed a garlic clove into about 20g of melted butter. The naan with bubble on top and brown on the bottom. Once the naan starts to brown on the underside (this will only take about 2 minutes) flip and cook for a further minute. Keep warm while cooking the remaining naan, either in foil or in a warm oven (about 100°C).
Although I haven’t tried it, apparently they freeze well.
This naan is perfect for mopping up the juices of either VJ’s chicken curryblack pepper and yoghurt curry or mussamun shanks. Or you might have another favourite of your own! It would also be great served with dips for a light lunch or pre-dinner snack.

If you’ve enjoyed this post please like it on Facebook, or even share it. Thanks! x

Dumplings

IMG_3812
Chinese New Year has just gone, so it’s a great time to add these to your repertoire (if I had been more organised I would have put this up sooner). I don’t typically like dumplings. I find them smooshy, gooey and watery…plus I can never be to sure what’s in them when I buy them, just like when I buy a meatpie…what’s in there?! When I make them myself I know what’s going in them! They are the best dumplings I have ever had, if I do say so myself! They can be steamed or cooked pot-sticker style. I prefer to pot-sticker them as I like the texture of the crunch on one side and softness on the other side.
Although this recipe is for chicken dumplings you can substitute the chicken for other meats. Pork or chicken & prawn or pork & prawn all work very well.
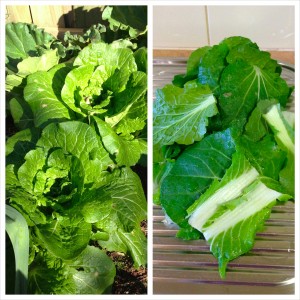
I planted some Wombok this year especially for dumplings. I was surprised that it came up so well. However, it had to be picked pretty quickly once it was ready and I’m sad so say it once made it into one batch of dumplings and the rest went to seed in the veggie patch…there are just not enough hours in the day!
IMG_3113_fotor
Makes 24

Ingredients
2 cups flour
3/4 cup boiling water
1 chicken breast, minced
2cm cube piece of ginger, finely grated
1 Wombok (chinese cabbage), shredded
4 spring onions, finely sliced
2 tbsp soy sauce
2 tsp sesame oil
1 tbsp chinese rice wine
1 tbsp vegetable oil
Dipping sauce
2 tbsp soy sauce
1 red birdseye chilli, finely sliced

Method
Make the dough first as it will need to rest (if you don’t want to make the dough you can always buy gow gee wrappers from the supermarket). Combine the flour and water (make sure it is just boiled) in a food processor until just combined. Remove the dough and knead by hand for a couple of minutes. Wrap in cling wrap and set aside while you make the dumpling mixture.
For the dumpling mixture all that needs to be done is combine all the ingredients. Make sure the ingredients are all covered in the sauces. Be careful the mixture isn’t too sloppy as this will make the dumplings very difficult to handle – plus they’ll taste a little sloppy.
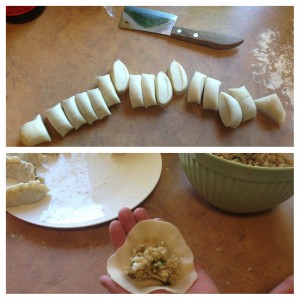
IMG_3907Now the dough needs to be rolled out, make sure you flour the bench sufficiently along the way. I find it’s easiest to divide the dough into two and roll it into a log with a diameter of about an inch. Then chop into rounds that about about 10g each. One by one roll the dough into thin rounds. Place a round of dough in the palm of one hand and scoop 1 tbsp of dumpling mixture into the middle. Enclose the mixture by folding over the dough and pinching the edges together. You can also make pretty patterns! Place the dumplings on a floured tray (the sloppier the dumpling mixture the more likely they are to stick to the tray).
If you want potstickers heat the vegetable oil in a  frypan that has a lid. Arrange the dumplings in the pan on their sides and cook on a medium heat for about 4 minutes, or until they start to brown on the underside. Pour in 1/2 cup of water and cover with the lid. Once the water has evaporated remove the lid and continue to cook for a couple of minutes. Remove from the pan to a platter. Combine the soy and chilli and serve with the potstickers (the earlier you do this more the soy will take on the chilli flavour – we like to do this early!).

If you don’t want to eat all the dumplings at once place the dumplings in the freezer on a tray. Make sure the dumplings aren’t touching each other. Once they are frozen you can put them in a container or plastic bag. Defrost before cooking according to the above method.

If you’ve enjoyed this post please like it on Facebook, or even share it. Thanks! x

VJ’s Chicken Curry

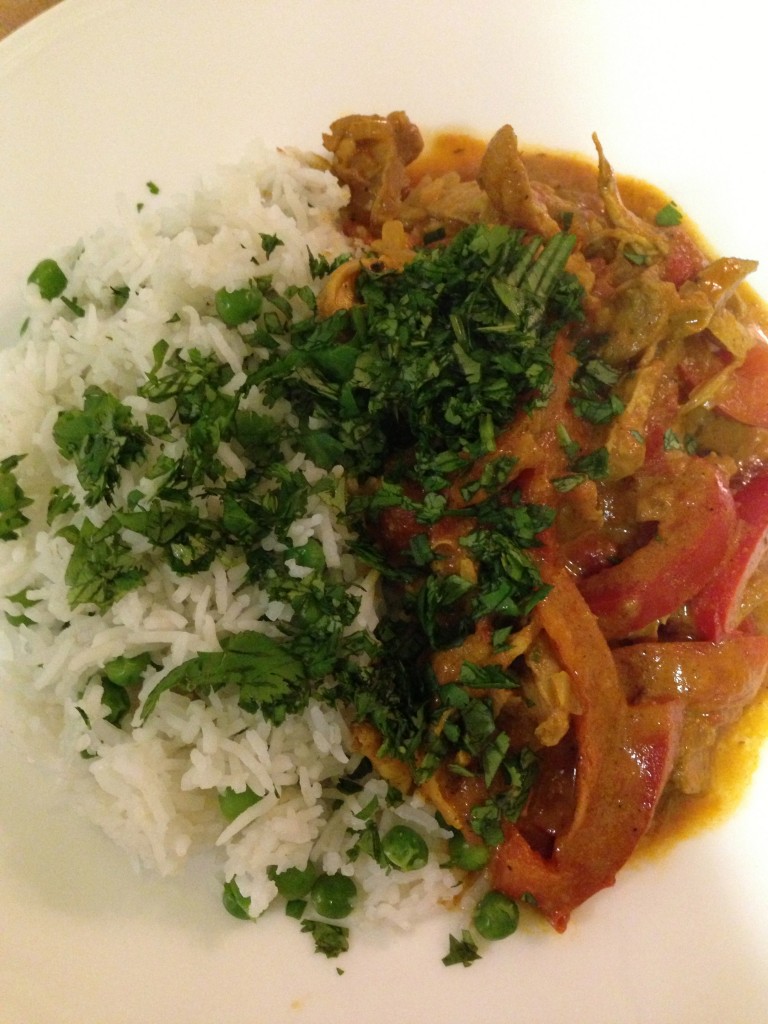
IMG_2790When my parents were travelling in Canada they were taken to a very popular Indian restaurant in Vancouver called VJ’s. As a gift from their hosts they were also given a cookbook produced by the restaurant. This is the only recipe I have cooked from the book. It’s so good that I haven’t managed to cook anything else from it yet! Over time we’ve tweaked a couple of the ingredients and added capsicum and we think it’s perfect.

This curry is stunning. Delicious the night that it’s made and freezes really well too. We usually make a double batch and freeze half for a quick and easy mid-week meal. Serve with steamed rice and pappadams – delicious!

Serves 4

Ingredients
1 tbsp olive oil
1 large onion, finely diced
3 cloves garlic, finely diced
2 tbsp ginger, grated
1 tbsp salt
1/2 tsp ground black pepper
1 tsp turmeric
1 tbsp ground cumin
1 tbsp ground coriander
1 tbsp garam masala
1/2 tsp cayenne pepper (more or less to suit your palate)
1 can chopped tomatoes
1 kg chicken thigh fillets, skinless
1 red capsicum, sliced
1 cup light sour cream
1 cup chicken stock
1/2 cup chopped coriander

Method
Heat oil in a casserole dish over low-medium heat. Add onion and saute until golden, add garlic and saute for another couple for minutes. Add all spices and tomatoes and cook for about 5 minutes until the oil starts to separate and is very fragrant.

Add chicken and cook for 10 minutes until all white. Add capsicum, chicken stock and sour cream. Simmer for a further 15 minutes until chicken is cooked through. Let chicken cool slightly and pull apart to bite sized pieces. Stir through chopped coriander and serve with rice and pappadams.
IMG_4013Or, if you’re feeling up to it make sure you get some naan on the go to mop up all the sauce…yummo!

Runny Yolk Ravioli

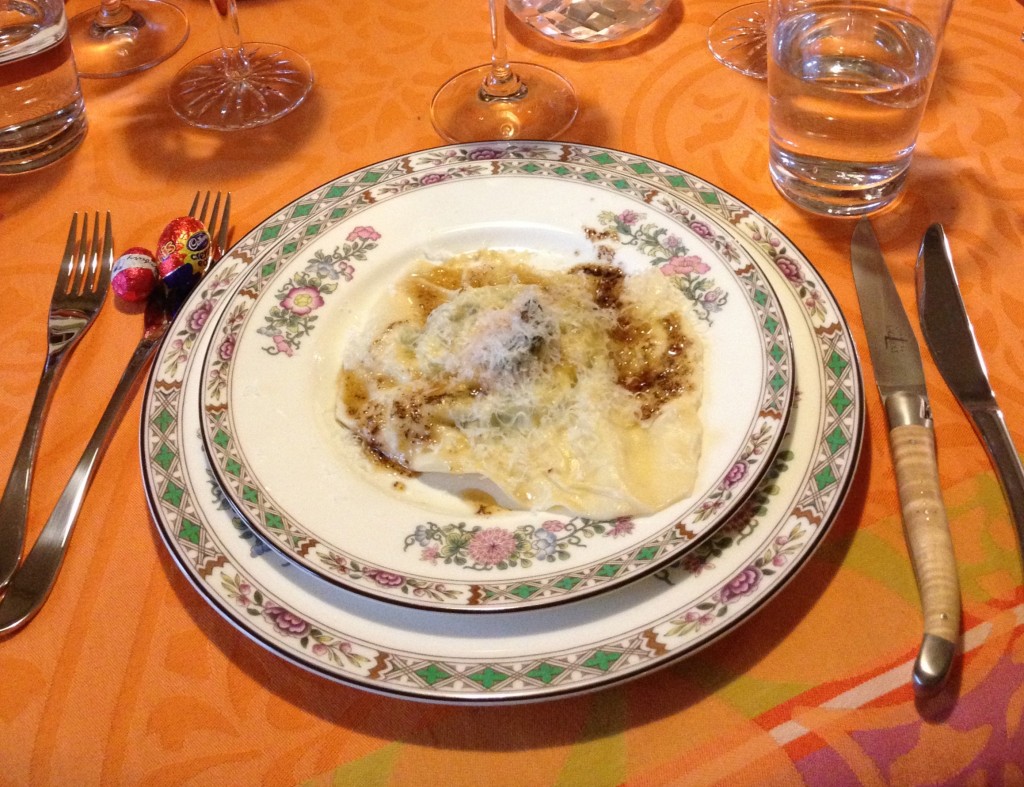
runny yolk ravioliI originally came across this ravioli on My Kitchen Rules. I must say, I’m glad I could see what they’re doing, but it is fairly straight forward, just a little fiddly.

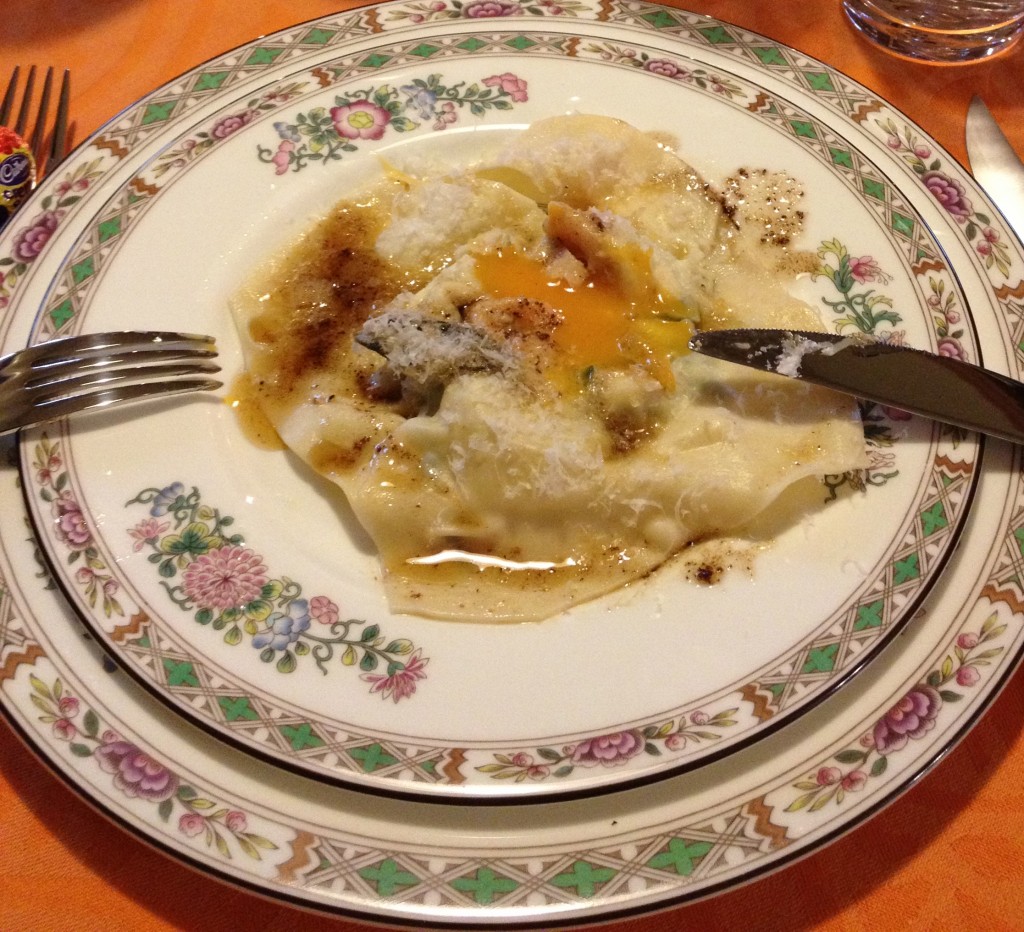
This little entrée certainly has the wow factor, but it’s also fairly high maintenance. The trick is to cook it to perfection so that when the ravioli is cut open, the yolk oozes out, just like a perfectly poached egg. It is very important that the yolk remains intact throughout preparation. There are two points when this can go wrong…when the egg is separated and when the yolk is lowered onto it’s bed of ricotta and spinach. Make sure you have a few extra eggs on hand just in case!

Unfortunately, there’s not a lot that can be prepared ahead of time. If the spinach is left to sit around for a while it will probably start to leech more water – even if you’ve already squeezed it out – and make the mixture too sloppy. The pasta dough can be made in advance (it should have about half an hour to rest) but should be rolled out close to cooking time. If the dough it dry it will be hard to stick the two sheets together to seal the ravioli – which is very important.

With all of this in mind, you’ll do great!

Serves 4

Ingredients
1/2 quantity fresh pasta
Ravioli filling
3/4 cup fresh ricotta
1 bunch spinach (about 200g)
1/3 cup parmesan (preferably grana padana), finely grated
pinch of finely grated nutmeg
finely grated zest of 1/2 a lemon
4 egg yolks
Burnt Butter Sauce
100g butter
8 sage leaves

Method

Prepare the fresh pasta dough and rest in the fridge for half an hour.

For the filling, start by wilting the spinach in a dry frypan, if the spinach doesn’t already have a bit of moisture on it put a few drops of water in the pan. Remove from the heat and set aside in a strainer. After it has cooled for a few minutes push out as much liquid as possible and roughly chop.

In a bowl, combine ricotta, parmesan, lemon rind, nutmeg and spinach. Season with salt and pepper. Don’t over-season with salt as some saltiness will come from the butter sauce.

For the butter sauce, over a medium-high heat melt the butter. Once melted add the sage leaves. The butter will start to foam and once brown flecks start to appear remove from the heat. Set aside. The sauce can be quickly reheated while the ravioli are cooking.

Divide the pasta dough in two and working with one at a time roll out to 6 on the dial, they will be quite thin. You will need 2 long sheets of pasta, at least 15 cm wide. Flour the bench well, there’s nothing worse than assembling the ravioli and then not being able to get them off the bench! At this point it would be good to get the water boiling so that once the ravioli are ready you can cook them immediately.  Be sure to salt and oil the water.

Starting at one end, about 5 cm from the end, dollop about 1½ tbsp of ricotta mixture in the middle of the pasta sheet. Make it into a nice round blob and create a small well in the centre for the yolk to sit in. Repeat 3 more times along the length of the pasta sheet, with at least 5 cm in between each.

One at a time, separate the eggs. As you separate, drop the egg white into a glass and once free of the white gently roll the yolk into the well that you have created in the ricotta mixture. If the yolk breaks in any way, discard and try again. Once all egg yolks are in place cover with the second pasta sheet. Working your way along the pasta sheet from left to right, gently press the pasta onto the filling to eradicate any air bubbles. At the edge of the filling seal the two pasta strips together. Tip: don’t press too hard as you don’t want to stick the pasta to the bench top! Once all are sealed, divide them into individual ravioli using a pizza cutter or knife.

Cook the ravioli 2 at a time in the boiling water for 4 minutes. It is best that the water is on a slow boil so it doesn’t destroy the ravioli as they enter the water. If possible, have 2 pots of water on the go so that all ravioli are ready at the same time. Once cooked, the yolk should still be bouncy to touch, remove with a slotted spoon. Once all ravioli are on their plates, pour over the burnt butter sauce, it should just be a drizzle, ensuring all plates have a couple of sage leaves. Top with a little more grated parmesan as desired.
IMG_2543

When your guests ask for seconds it would be wise to show them how long the recipe is and tell them they were lucky to even get one! It might seem like hard work but it’s worth while.

If you enjoyed this post please “like” it on facebook, or even share it. Thanks! x
Beef fillet with black bean dressing

IMG_2241

This is a perfect special occasion meal, such as a dinner party or date night. The dressing, chopped coriander and spring onions, trussing the fillet can all be done in advance, leaving just the fillet to be cooked prior to serving. The only trick is sourcing the black beans. They can usually be found in Asian grocers…not in Warragul supermarkets!

Ingredients
1 tsp olive oil
1 x 1.5kg beef fillet
3 spring onions
1 cup coriander, chopped
Dressing
15g canned black beans, rinsed & lightly crushed
1 long red chilli, seeds removed & finely sliced
1 tsp ginger, grated
1/2 tsp sesame seed oil
1 1/2 tbsp soy sauce
1 tbsp mirin
1 tbsp lime juice
40 ml olive oil

Method
Preheat the oven to 180°C. Truss the beef fillet with kitchen string, tying at even intervals. Season with sea salt and freshly cracked pepper. Heat 1 tbsp of oil in an oven-proof frying pan over high heat. Sear on all sides until brown. Place in the oven and bake for 15-20 minutes. This should be medium rare, adjust cooking time for your preference. Cooking time will vary depending on the thickness of the fillet. Once cooked, remove from the oven and cover with foil to rest.

To prepare the dressing, place all dressing ingredients in a screw-top jar and shake well to combine.

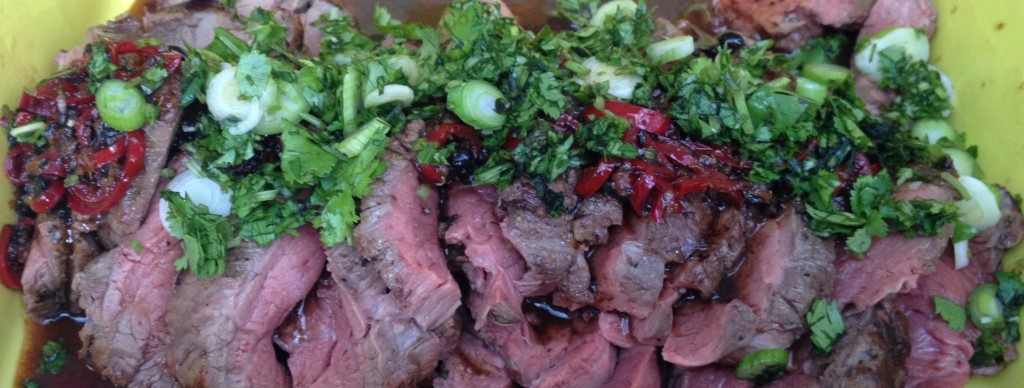
Slice the beef and arrange on a warmed plate or dish. Pour over the dressing and sprinkle over the coriander and spring onions.

We love to serve it with roast or mashed potatoes and steamed greens.

Chicken pot pies


Chicken, leek and bacon…can’t go past that combo. Think it couldn’t get any better? Top it with a disc of puff pastry and it will!

The pie mixture needs to be cooled before cooking it as a pie. It can be made the day before and stored in the fridge overnight.

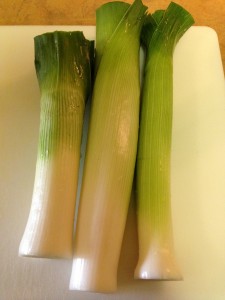
When I made these the other day I used homegrown leeks, parsley and lemon juice from our own lemon tree!

Straight from the veggie patch

Straight from the veggie patch

Makes 6

Ingredients
40g butter
1 tbsp olive oil
3 leeks, pale part one, finely sliced
4 bacon rashers
1kg chicken thighs
1 tbsp plain flour
pinch of nutmeg
200ml chicken stock
200ml sour cream or crème fraiche
2 tbsp parsley, finely chopped
2 tbsp lemon juice
2 sheets puff pastry
1 egg, beaten

Method
Melt butter and oil in a pan over medium heat. Add leek and bacon and cook until leek is softened, about 8 minutes. Add chicken and cook until slightly browned to seal. Stir in flour and nutmeg and cook for a further 2 minutes.

Add chicken stock and bring to a simmer. Simmer for about 15 minutes, or until chicken is cooked through. Allow to cool. Once cook remove the chicken and shred, not too fine though, it’s nice to have some decent sized pieces in your pie. Add the chicken back to the pot and stir through sour cream, parsley & lemon juice. Allow to cool completely.

Preheat oven to 200°C.

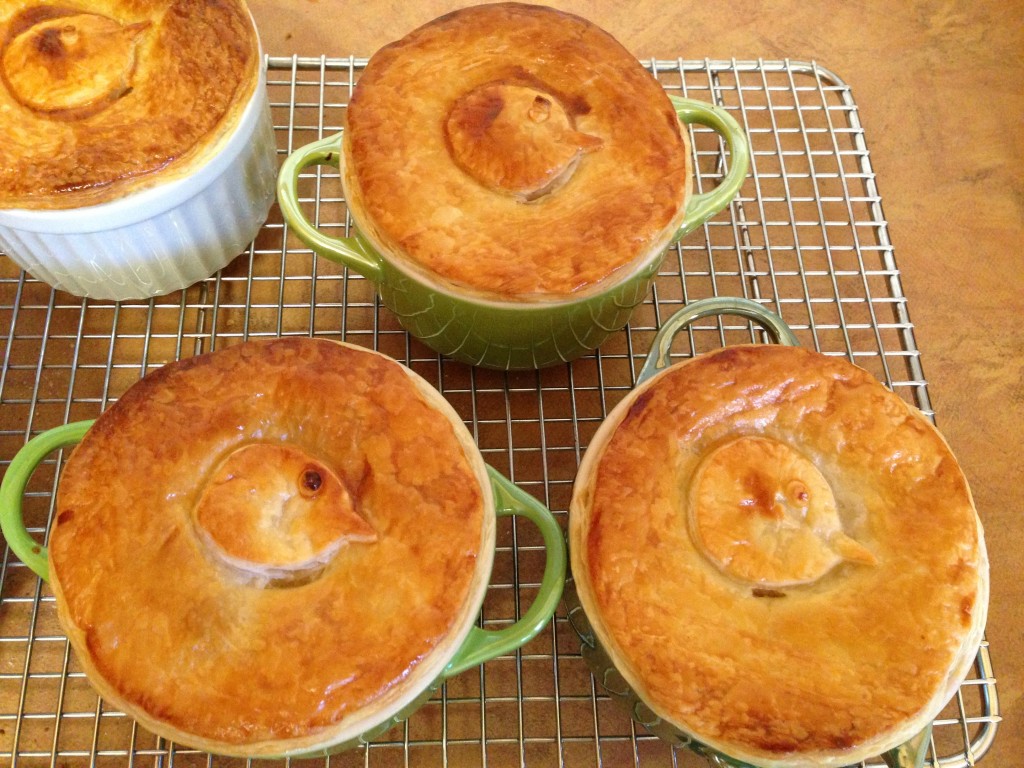
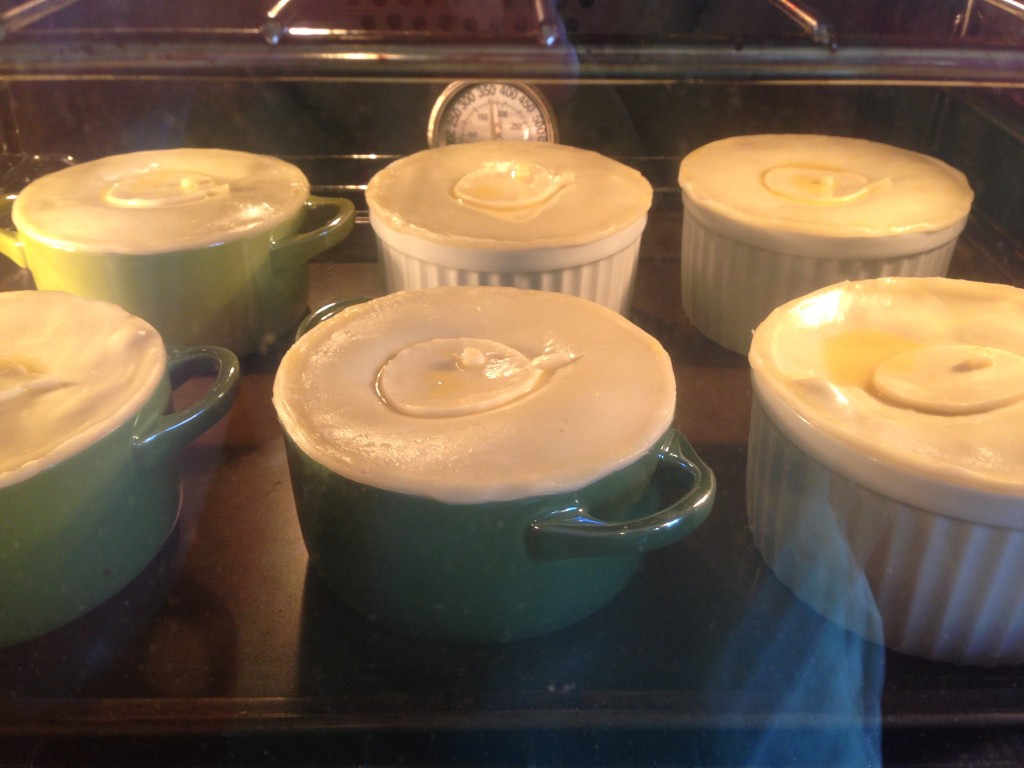
To assemble pies, fill ramekins to no more than 1cm from the top. Cut the puff pastry into rounds 1cm bigger in diameter than the ramekins. Push the pastry into the lip of the ramekin. (If you’re keen, there’ll be left over pastry for decorations).Brush the pastry with egg and bake for 20 minutes or until the pies are golden.

IMG_3082_fotor

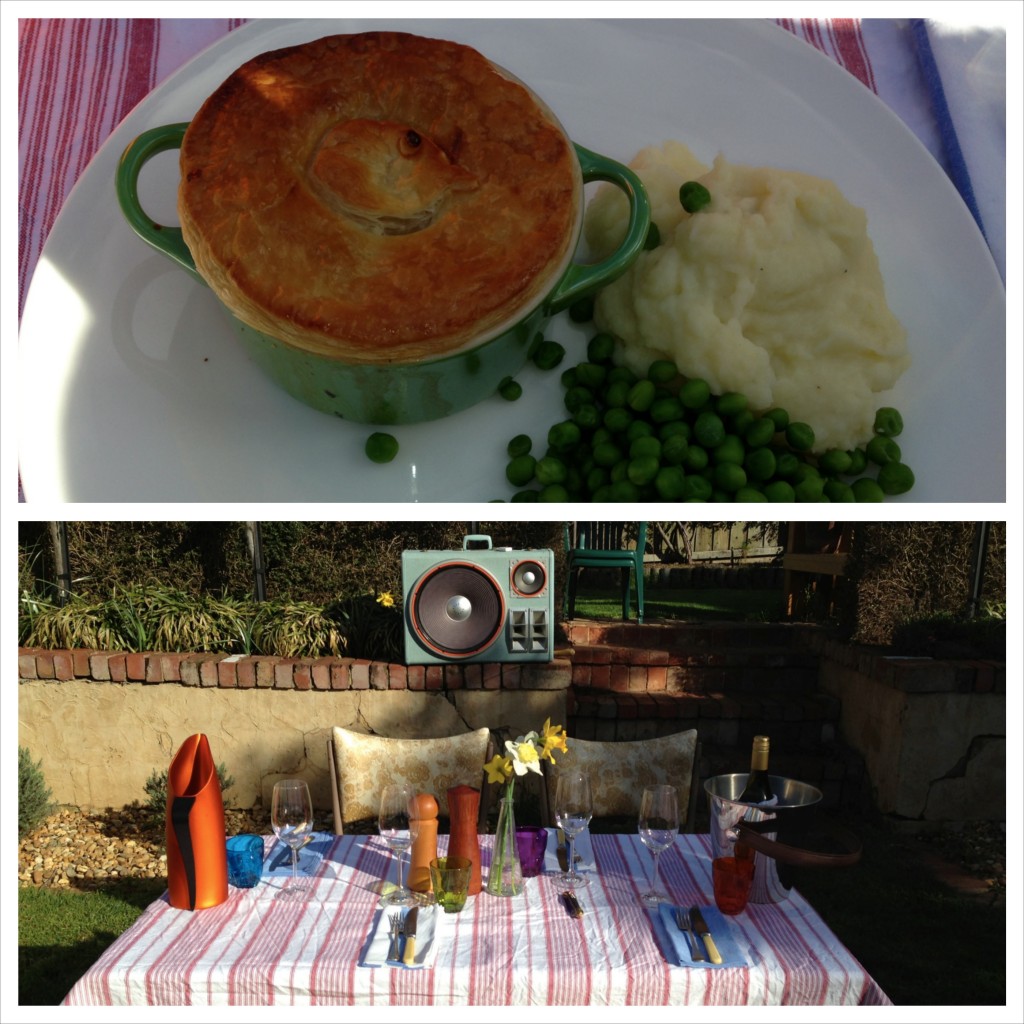
Serve with mash & peas and enjoy al fresco!

Want a different pie? Try Beef & Guinness pies!

If you’ve enjoyed this post please “like” it on facebook, or even share it. Thanks! x

Pad Thai

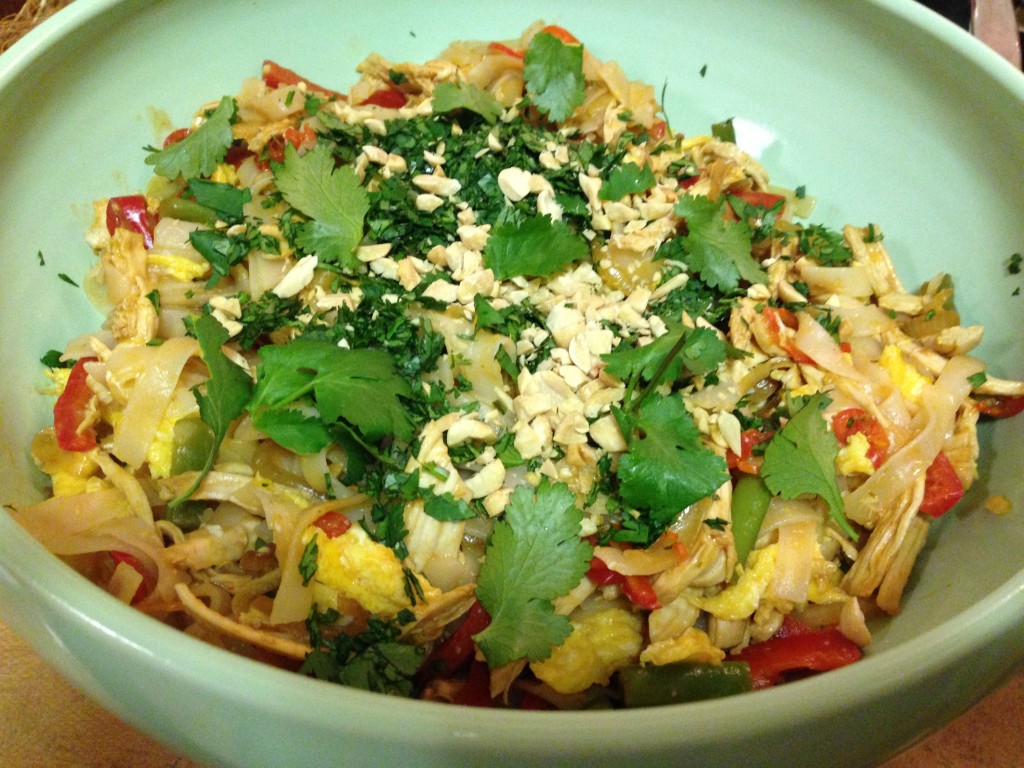
Pad Thai

I picked up this recipe when I was living in the UK a few years ago. There were heaps of cooking shows on at the time (I’m sure there’s even more now) which introduced me to many chefs over there, as well as the BBC’s food website. This recipe is adapted from the website, and I honestly can’t remember who the chef was…but the recipe is simple and delicious.

I have tried many different ways of cooking the chicken (it’s best to cook the chicken separately to the rest of the ingredients). I’ve grilled, barbequed and stir-fried. But what I find works best is poaching the chicken. Flavour can be added to the chicken in the poaching liquid. I like to add a spring onion, chicken stock and chilli flakes, or a split birds eye chilli, to the liquid.

Serves 4

Ingredients
2 chicken breasts
2 free-range eggs, lightly beaten
1 onion, thinly sliced
2 garlic cloves, thinly sliced
1 handful green beans, chopped bite-sized
1 red capsicum, sliced
1 handful bean shoots
1/2 cup chopped coriander
1/2 cup chopped dry-roasted peanuts
375 g packet dried rice stick noodles

Sauce
2 tbsp soy sauce
2 tbsp tomato sauce
Juice 1 lime
1 tbsp fish sauce

Method
Start by poaching the chicken. Place the chicken in a saucepan so that it fits snuggly. Cover with water and add your preferred flavours. Bring to the boil. Once boiling cook for a further 10 minutes, remove from the heat and set aside.

In a wok, scramble the eggs until just cooked (even slightly soggy). Remove from the wok and set aside. Add the onion and garlic and sauté until soft. Add the capsicum and beans and stir-fry for a couple of minutes. The rice noodles will need to be on about now, cook as per packet instructions.

Shred the chicken and add to the wok. Add the sauce to the wok and stir to coat. Add the cooked rice noodles, egg and bean shoots. Gentle toss everything together. Top with coriander and nuts.

If you like this one, you will probably like caramel chicken!

If you’ve enjoyed this post, please “like” it on facebook, or even share it. Thanks! x

Zucchini & Gruyere Souffle

IMG_2833

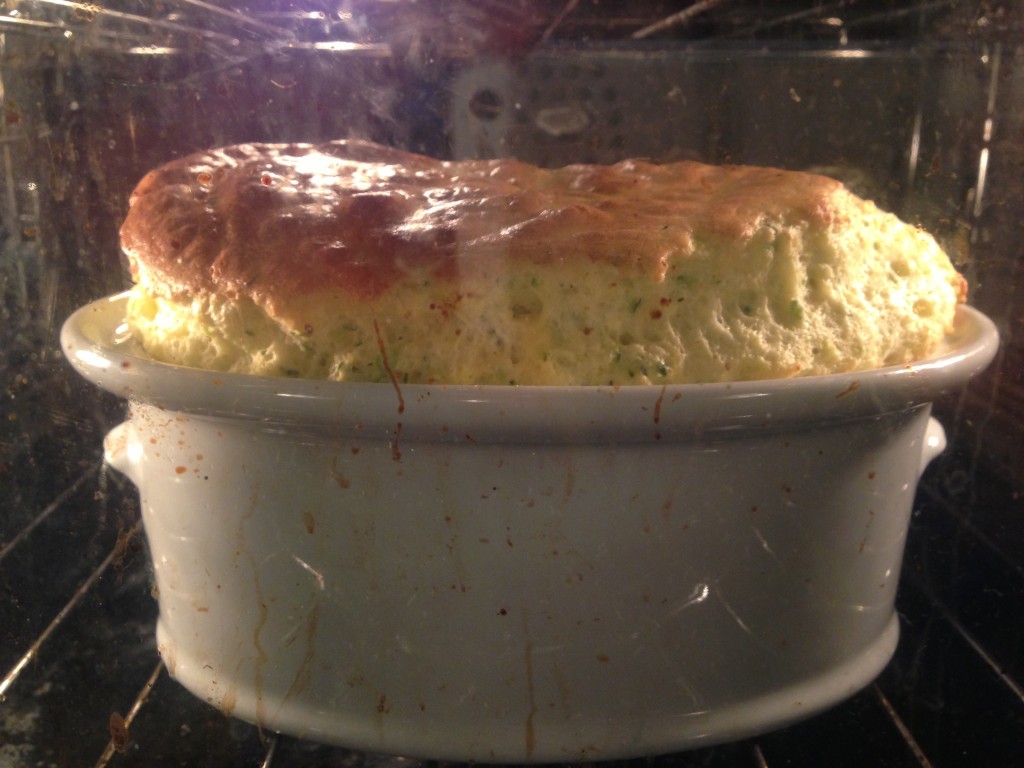
Excuse the dirty oven, I have cleaned it since…

Light and fluffy, this is an excellent option for when you’ve had enough meat for the week. But even better as vegetarian protein option for a dinner party. Your vego friends will love you because it’s that good! It might sound bizarre as a dinner party option but a lot of it can be prepared ahead of time. Just before putting in the oven all that needs to be done is whisk the egg whites, fold them through the roux and bung it in the oven for 30 minutes. Timing is important though; you don’t want the soufflé sitting around out of the oven before serving so make sure you know when all your other delights will be ready.

The WOW factor occurs when you whip that soufflé out of the oven and take it straight to the table. Some of Dad’s oldest friends wax lyrical, 30 years after the event, when he pulled individual chocolate soufflés out of the oven on the dot of midnight at a New Years Eve dinner party. I’d be a rich woman if I had a buck for every time I heard that story…

This soufflé feeds 4 for dinner with other veggie accompaniments. I prefer to serve it with roast potatoes and a spinach & almond salad. Something crunchy next the soft soufflé makes a great textural combo. This recipe was adapted from The Food of France.

Ingredients
1 tbsp butter, melted
2 tbsp breadcrumbs
350g zucchini, 1cm slices
125ml milk
30g butter
30g plain flour
85g gruyere, finely grated
3 spring onions, finely chopped
4 eggs, separated

Method
Preheat the oven to 180C. Brush a 1.5 L soufflé dish with melted butter. Tip in the breadcrumbs to coat the dish. Tip out the excess crumbs. This will make sure the soufflé doesn’t stick to the dish, but will also help it rise.

Cook the zucchini in boiling water for 10 minutes, or until soft. Drain and when cooled slightly push some water out of the zucchini. Whizz in a food processor with the milk until smooth. If you do not have a food processor, or can’t be bothered with the washing up, use a potato masher to blend the zucchini and milk until smooth.

Meanwhile, melt the butter in a heavy-based saucepan. Add the flour and cook for 2 minutes. Add the zucchini and milk mixture and continue to stir until thick and smooth. Boil for 3 minutes. Remove from the heat and stir through the gruyere and spring onions. Add the egg yolks one at a time, stirring each until well combined. Everything up until now can be prepared ahead of time. If finishing it off later cover with cling film so that the cling film sits over the mixture. This will ensure a skin doesn’t form.

Whisk egg whites until soft peaks. Stir a ¼ through the roux (zucchini mixture) to lighten it up. Fold through the remaining egg whites and delicately poor into the prepared dish (if too heavy handed all the airiness of the egg whites will be knocked about). Bake for 30 minutes. The soufflé is cooked when it wobbles very slightly when wiggled. As it hits the table it will cook a little further, making it perfectly cooked by the time it’s served.

If you’ve enjoyed this post please “like” it on facebook, or even share it. Thanks! x